Published
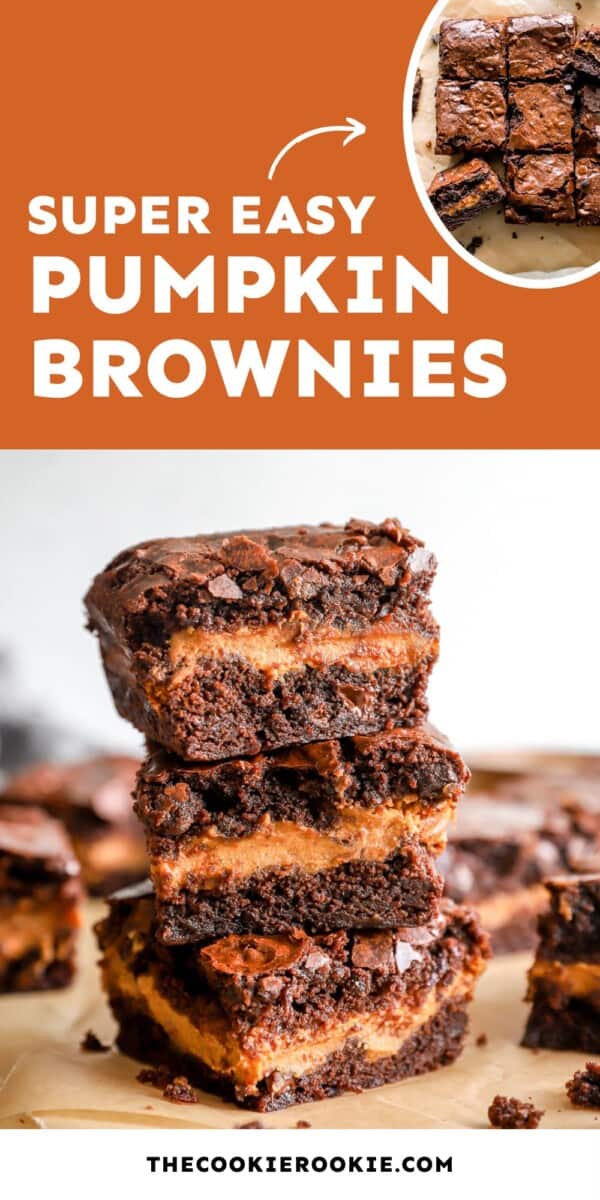

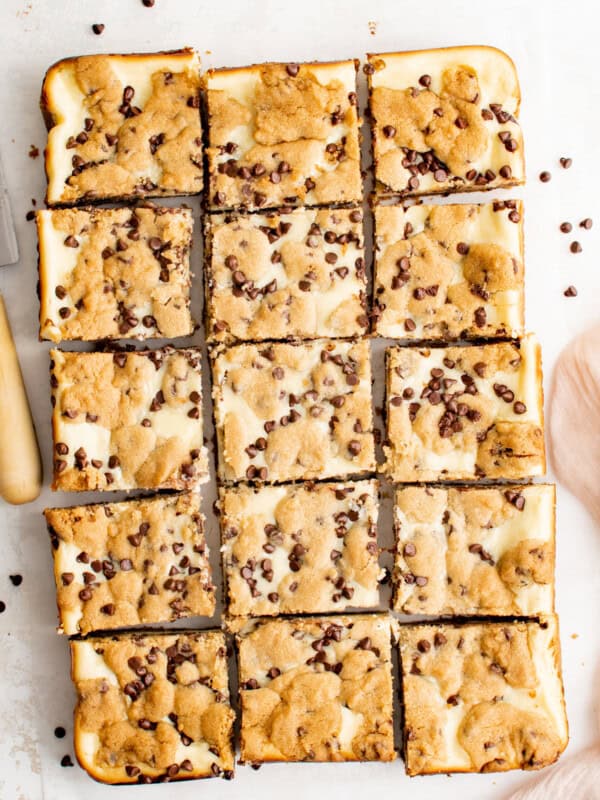
Pumpkin Brownies are the perfect mix of two of my favorite desserts: brownies and pumpkin pie! I made these fall brownies with a boxed brownie mix of and layer of pumpkin in the middle to create something super fun, delicious, and easy! And they look really pretty, too!
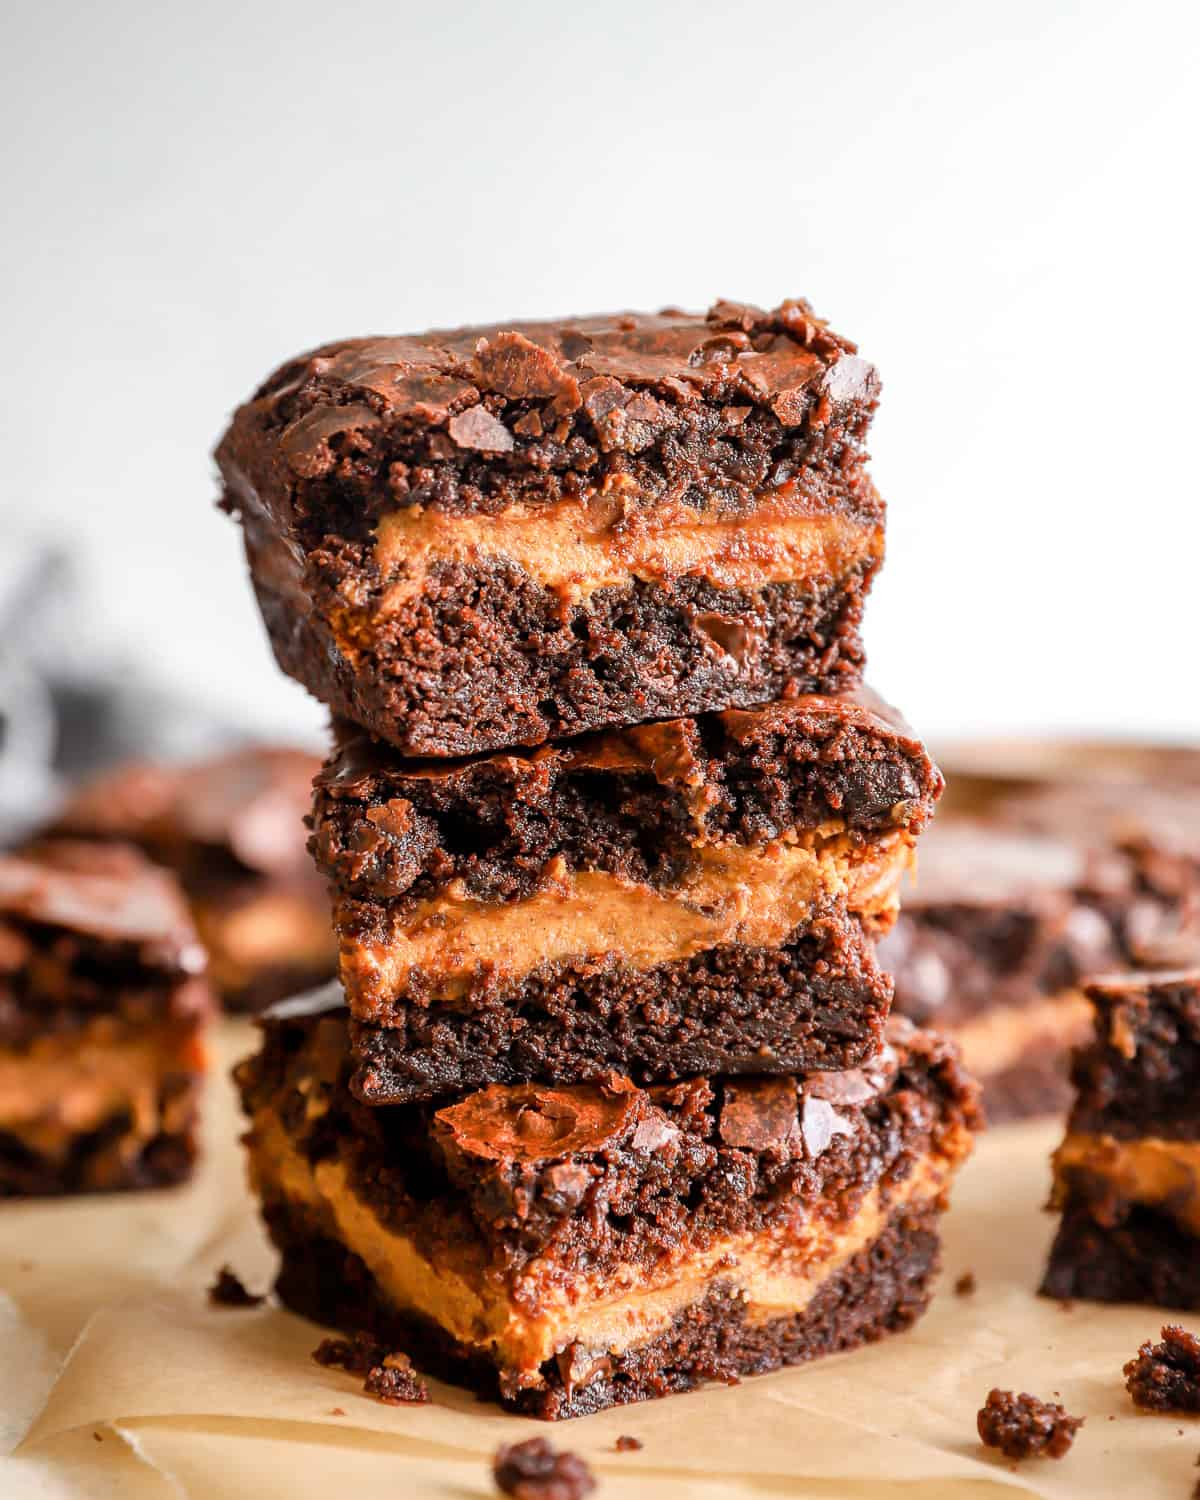
In my opinion, these pumpkin brownies are the perfect blend of chocolate and pumpkin. My boxed mix modification turns ordinary brownies into amazing pumpkin treats! These fall brownies are such a fun and festive Halloween dessert with their bright orange and deep brown (almost black!) color. I like to add some colorful sprinkles on top or crushed-up candies to make them even more festive!
What’s in my Pumpkin Brownie Recipe?
- Brownie Mix: You can use any brownie mix you like (I used Ghirardelli), so you’ll be following instructions based on the one you choose. The box will tell you how to prepare the brownie batter and what temperature you should use in the oven. I’ll help you out with the rest!
- Water: Use the amount stated on the box of mix you buy to hydrate the dry brownie mix.
- Oil: Vegetable oil moisture and makes the brownies tender. Again, use the amount listed on the box.
- Egg: Adds structure to the brownies. Most boxed mixes call for just one egg, but double-check to be sure! If you don’t have any eggs around, add ¼ cup of pumpkin puree for each egg called for in the brownie mix. This will add even more delicious pumpkin flavor!
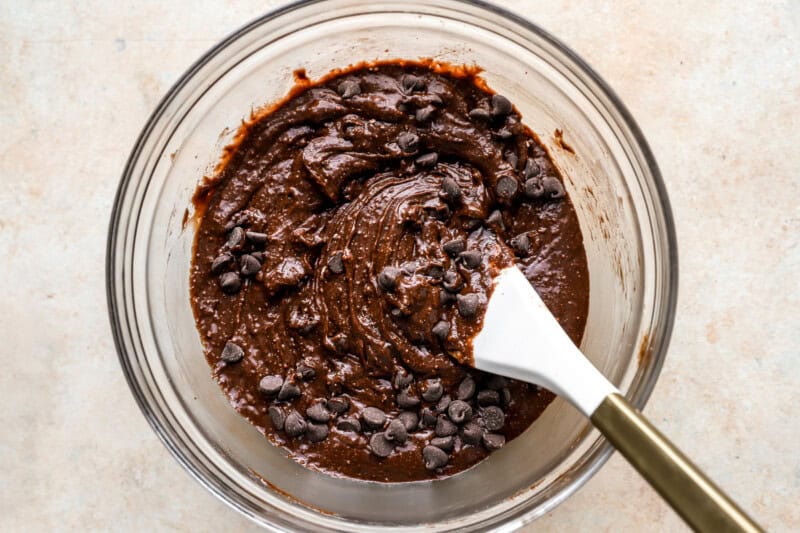
- Chocolate Chips: I like to add some chocolate chips to the brownie mix to make them a little more chocolatey. You can use whatever kind of chips you like, including white chocolate or cream cheese!
- Pumpkin Puree: This is going to give these brownies that classic fall flavor. Make sure to use 100% pumpkin puree, not pumpkin pie filling!
- Cream Cheese: Gives the filling structure and makes it just a bit tangy, like my favorite pumpkin pie cheesecake.
- Sugar: Granulated sugar sweetens the pumpkin layer.
- Pumpkin Pie Spice: Adds that classic spiced flavor to the brownies.

Tips for Success
- Preheat your oven to whatever it says on the brownie mix box. 350°F is a good go-to temperature.
- Be sure to spray the baking pan with nonstick spray; this will make it much easier to get them out later without ruining them.
- If you’re wanting a more homemade taste, try my favorite brownies from scratch! For a gluten-free version, use my homemade gluten free brownie recipe.
- Your filling might be a bit too sweet if you accidentally purchase pumpkin pie filling instead of puree. If this happens, don’t use the sugar or spices that the filling calls for, or it will be way too sweet.
- Some commenters have noted that they found the pumpkin filling to be a bit too tangy. If you’d like yours less tangy, add an extra tablespoon of sugar!
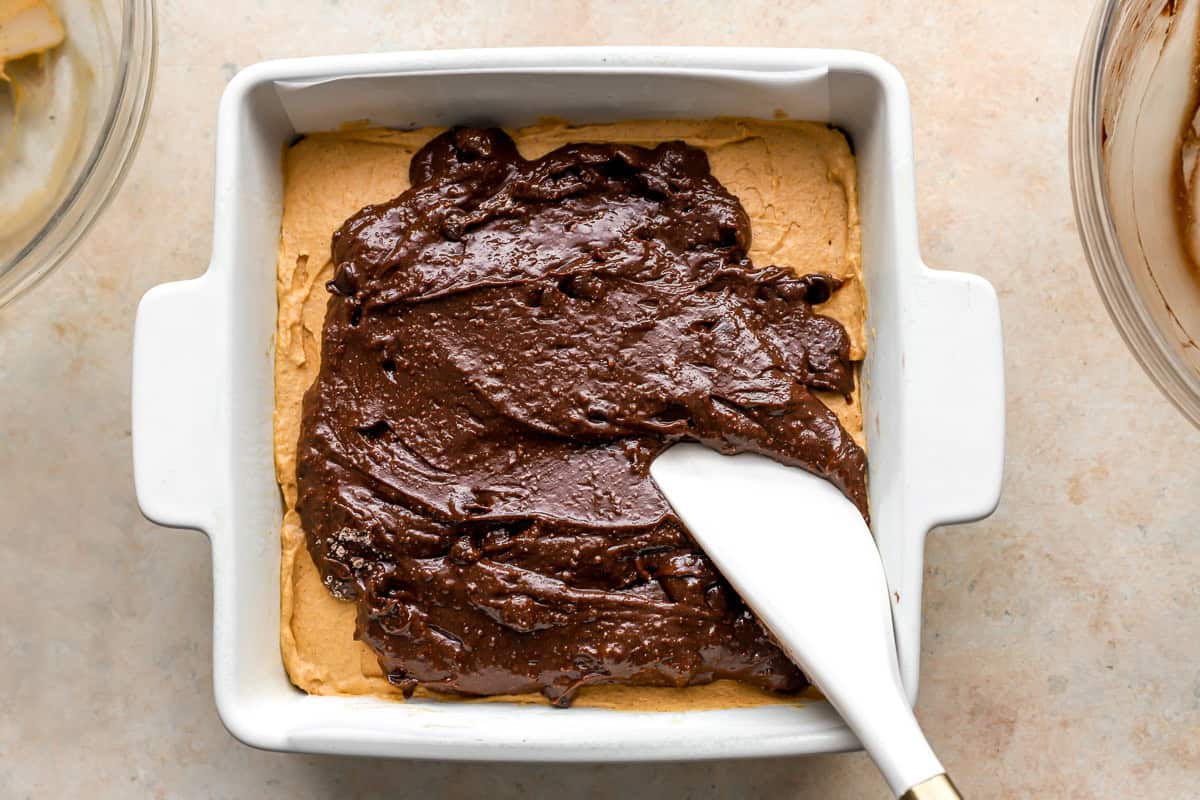
- Pour half of the brownie mix into the pan and spread out so the entire bottom of the pan is covered. Then add in the layer of pumpkin puree (spread it out evenly, or just add spoonfuls of it). Lastly, pour the rest of the brownie batter over the pumpkin and smooth it out.
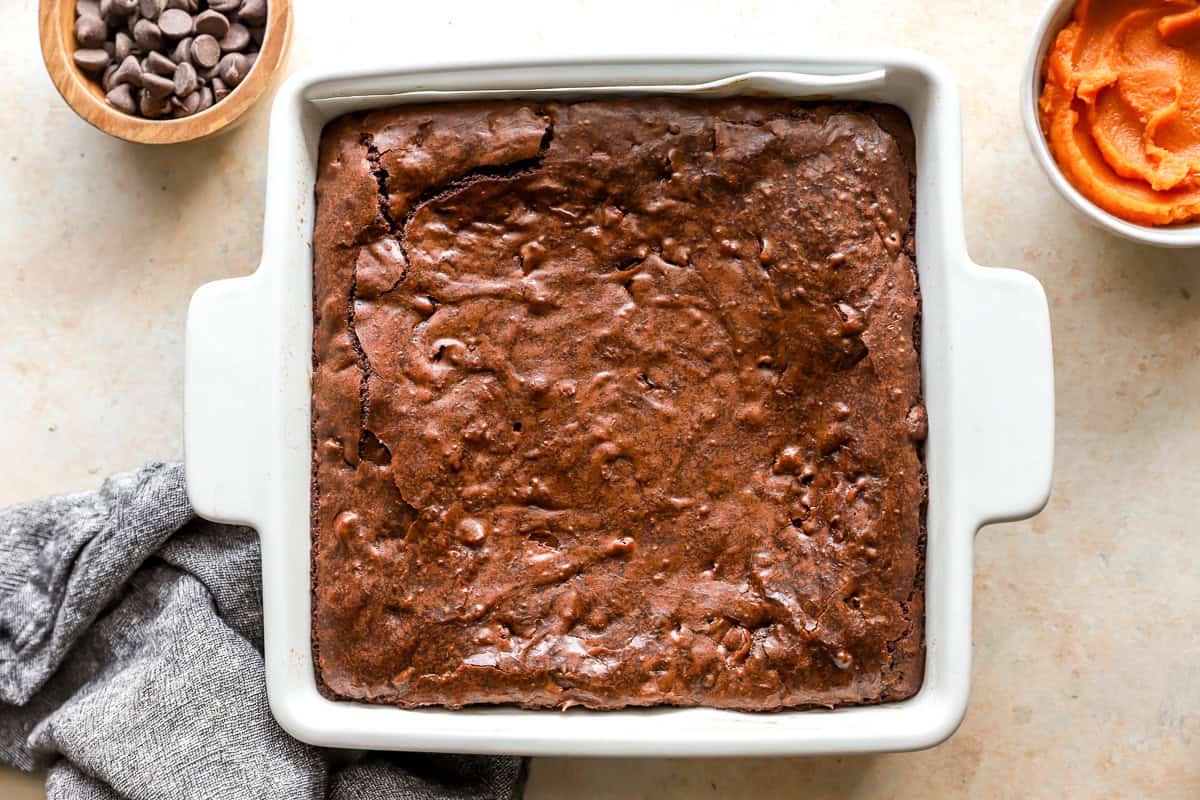
- Add about 10 minutes to the baking time listed on the box. Since you’re adding quite a bit of depth with the layer of pumpkin, you’ll need to cook them a bit longer.
- To check if brownies are done, dip a fork into the middle of the brownies. If the fork comes out clean, they are done. If there’s some batter on it, put them back in to cook a little bit longer. Cook in increments of a couple of minutes, then check again.
- These fall brownies do not need to be stored in the refrigerator. In fact, doing so will remove moisture and might just make them harder and more crumbly.
How to Store and Reheat
Store leftover pumpkin brownies in an airtight container at room temperature for up to 4 days. They will keep for up to 1 week in the refrigerator or for 3 months in the freezer but may lose some of their moisture over time. Enjoy at room temperature or gently warmed in the microwave.

5-Star Review
“I made these on 7 Sep 2021, exactly as written, nothing short of 10 stars! They are excellent, and very easy to make! My family loved these. When I get home (next month, Thailand) I will make these with fresh pumpkin and a homemade brownie mix.” – Lee Thayer
Pumpkin Brownie Recipe

Ingredients
For the Brownies
- 18 ounces brownie mix 510 grams, Ghirardelli recommended
- ¼ cup water 57 grams
- ⅓ cup vegetable oil 67 grams
- 1 large egg 50 grams
- ½ cup semisweet chocolate chips 85 grams
For the Pumpkin Layer
- 7.5 ounces pumpkin puree 213 grams (½ can) – not pumpkin pie filling!
- 6 ounces cream cheese 170 grams, room temperature (¾ brick)
- 3 tablespoons granulated sugar 38 grams (see note)
- 1 tablespoon pumpkin pie spice 9 grams
Video
Instructions
- Preheat oven according to box mix (325°F for Ghirardelli). Spray an 8×8-inch baking pan with nonstick spray. Set aside.
- In a medium bowl, make the brownie mix according to the directions on the box. Above are the ingredients for Ghirardelli Double Chocolate Brownies. Adjust ingredients to fit your box mix. Add the chocolate chips to the brownie mix and set aside.18 ounces brownie mix , ¼ cup water, ⅓ cup vegetable oil, 1 large egg, ½ cup semisweet chocolate chips

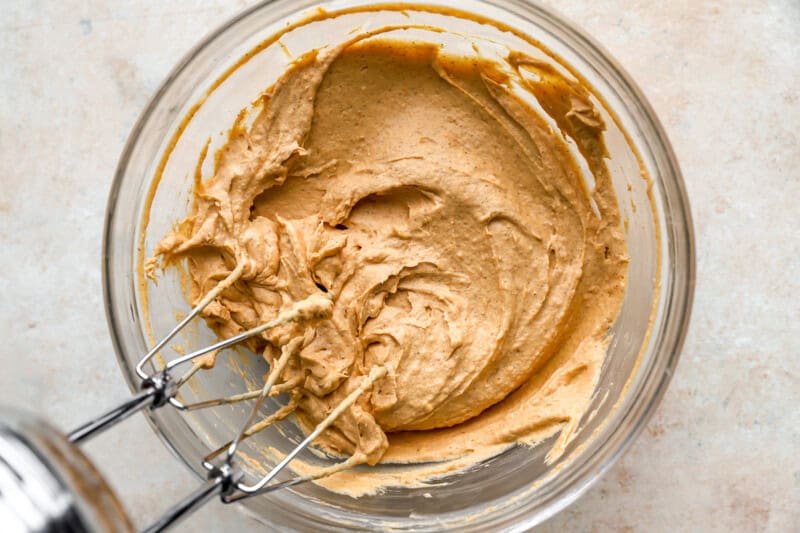
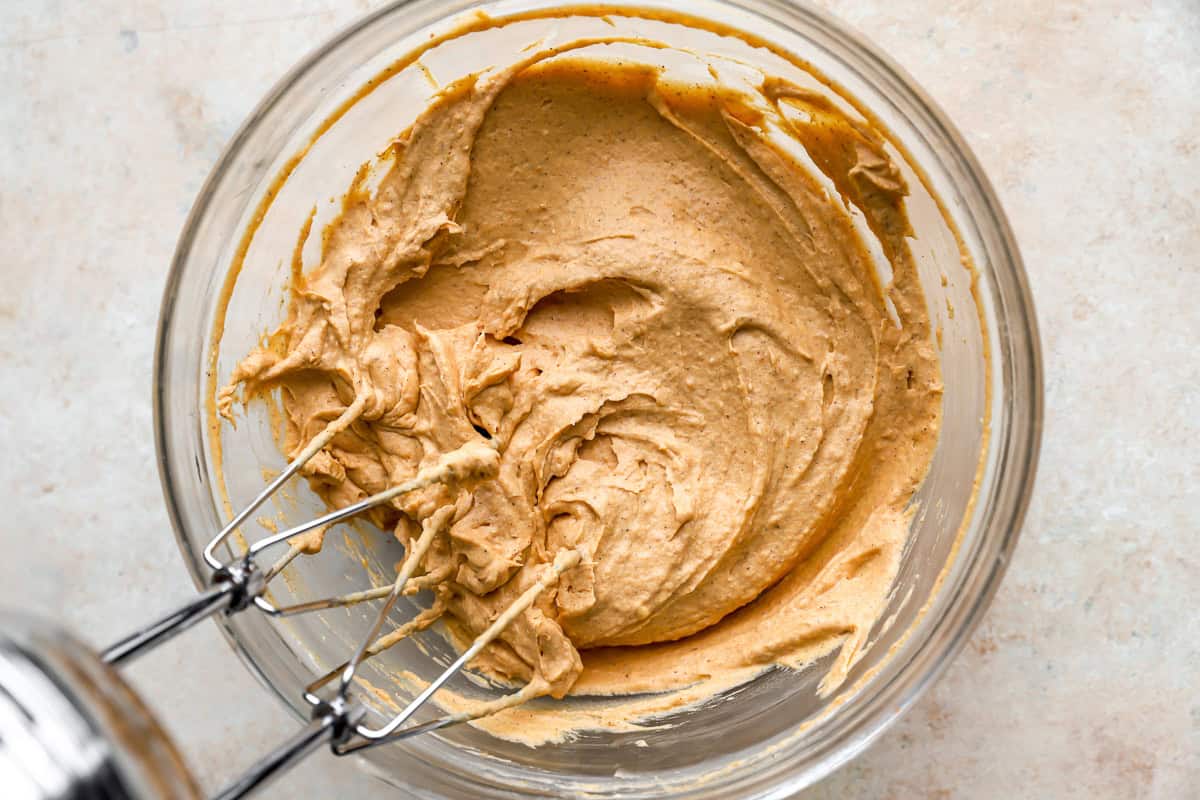
- In a medium bowl, mix the pumpkin, cream cheese, sugar, and pumpkin pie spice together until very smooth.7.5 ounces pumpkin puree, 6 ounces cream cheese, 3 tablespoons granulated sugar, 1 tablespoon pumpkin pie spice
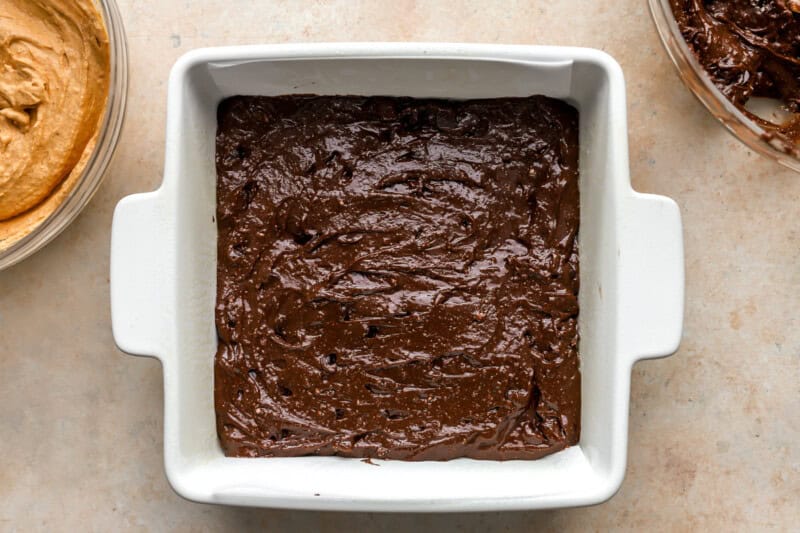
- Pour half of the brownie mix into the prepared pan and spread out so the entire bottom of the pan is covered.
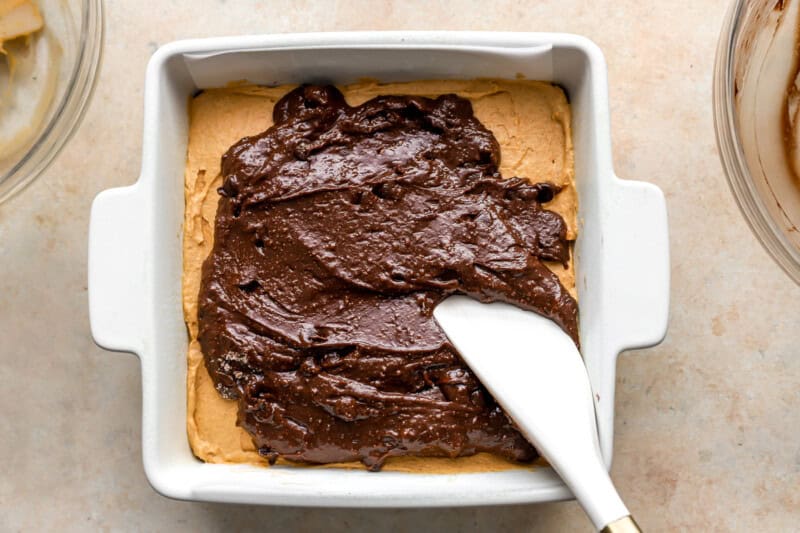
- Spoon the pumpkin filling onto the brownie batter in chunks or spread it out evenly, then cover the pumpkin with the rest of the brownie batter and smooth out the top.
- Now you're ready to bake! I added 10 minutes to the directions on the box (cooked for 50 minutes for my pan size). Since you're adding quite a bit of depth with the pumpkin mix, you'll need to cook longer.
- Let the brownies cool before slicing and serving.

Equipment
- Kitchen Scale (optional)
- 8×8-inch Baking Pan
Becky’s Tips
- Note: Some commenters have noted that they found the pumpkin filling to be a bit too tangy. If you’d like yours less tangy, add an extra tablespoon of sugar!
Nutrition information is automatically calculated, so should only be used as an approximation.
How to Make Pumpkin Brownies Step by Step
Prepare the Brownie Mix: Preheat oven according to box mix (325°F for Ghirardelli). Spray an 8×8-inch baking pan with nonstick spray. Set aside. In a medium bowl, prepare an 18-ounce box of brownie mix according to the directions on the box. For Ghirardelli, I mixed in ¼ cup of water, ⅓ cup of vegetable oil, and 1 large egg. Add ½ cup of chocolate chips to the brownie mix and set aside.

Make the Pumpkin Filling: In a medium bowl, mix 7.5 ounces (½ can) of pumpkin puree, 6 ounces (¾ brick) of softened cream cheese, 3 tablespoons of granulated sugar, and 1 tablespoon of pumpkin pie spice together until very smooth.
Spread the Brownie Batter: Pour half of the prepared brownie mix into the prepared pan and spread out so the entire bottom of the pan is covered.

Layer the Pumpkin Filling: Spoon the pumpkin filling onto the brownie batter in chunks or spread it out evenly, then cover the pumpkin with the rest of the brownie batter and smooth out the top.
Bake the Brownies: Now you’re ready to bake! I added 10 minutes to the directions on the box (cooked for 50 minutes for my pan size). Since you’re adding quite a bit of depth with the pumpkin mix, you’ll need to cook longer. Let the brownies cool before slicing and serving.


These were so gross my mom started to throw up! She said these tasted like pumpkin poop!!!! So nasty and gross and we are pumpkin lovers not for us
Sorry they didn’t turn out for you Miley!
These were absolutely amazing we made them in my culinary class and sold them at our school Cafe
We’re so happy to hear that, Rose!
I made these in a 9″ by 13″, and they tasted like fall–yum! The changes I made to the recipe: I added 1/2 cup more chocolate chips, plus chopped up dark chocolate bar (because I prefer the melted quality as opposed to chocolate chips that stay stabilized). I used 5 tbs of sugar in the cream cheese layer. I baked it for 33 minutes, but it could have cooked longer because they turned out so soft. Basically impossible to cut cleanly and present beautifully on a tray. Delicious, but fall apart gooey!
Thanks so much for sharing what worked for you, Erika!
I just baked a pan of these brownies. I think with a few adjustments it can be 5 Star. I believe the problem with the sharp taste of the pumpkin filling is the large amount of pumpkin pie spice (1 Tbs.) I also think that when baked in an 8″ pan, this is more like a cake instead of a bar. Will try again in a 9″ pan, increase the sugar to 5Tbs., add a tsp of vanilla and decrease the pumpkin pie spice to 1/2 Tbs.
Thanks for sharing your thoughts, Wendy!
I only had a 9×9 pan which made a thin layer of the brownie batter, so I swirled the pumpkin mixture into the batter.
Sounds like a delicious adjustment!
I absolutely love these!!! I added an extra tablespoon of sugar to the pumpkin mix since many comments said the pumpkin layer was too sour so I added an extra tblspoon of sugar and turned out amazing!
We’re so glad you enjoyed them! We’ve updated the recipe notes to include the optional extra sugar.
Love the recipe. My pumpkin mix was runny so when I put the 2nd half of brownie mix it went down. I just used a knife and mixed the top (marble). Because the middle was runny I added 5 more minutes. It was perfect and delicious. It didn’t taste sour and pumpkin and chocolate goes together. Thanks
Thanks for sharing!
I agree with the other comments that the pumpkin layer tasted a bit sour (from the cream cheese most likely) and could use some more sugar to match the sweetness of the brownies. Not a bad recipe per se, maybe pumpkin and chocolate just don’t go together…?
Definitely modify to your liking!
Hi! Excited to make these :) I’m using a 13×9 pan. Do you have a recommendation for how long to bake? I’m a bit of a baking novice 😬 Thanks!
Totally depends on your oven, start at 25 and continue until toothpick comes out clean!
I just made these brownies for a work event and they got the 2 thumbs up. My local store was out of canned pumpkin so I substituted a jar of pumpkin butter (only ingredients were pumpkin, honey, cinnamon, nutmeg and cloves) and it came out great. (I left out the sugar and pumpkin pie spice from the recipe). I did have to bake a little longer than suggested but they came out firm inside. I’ll definitely make these again
Thanks for sharing your modification!