Published
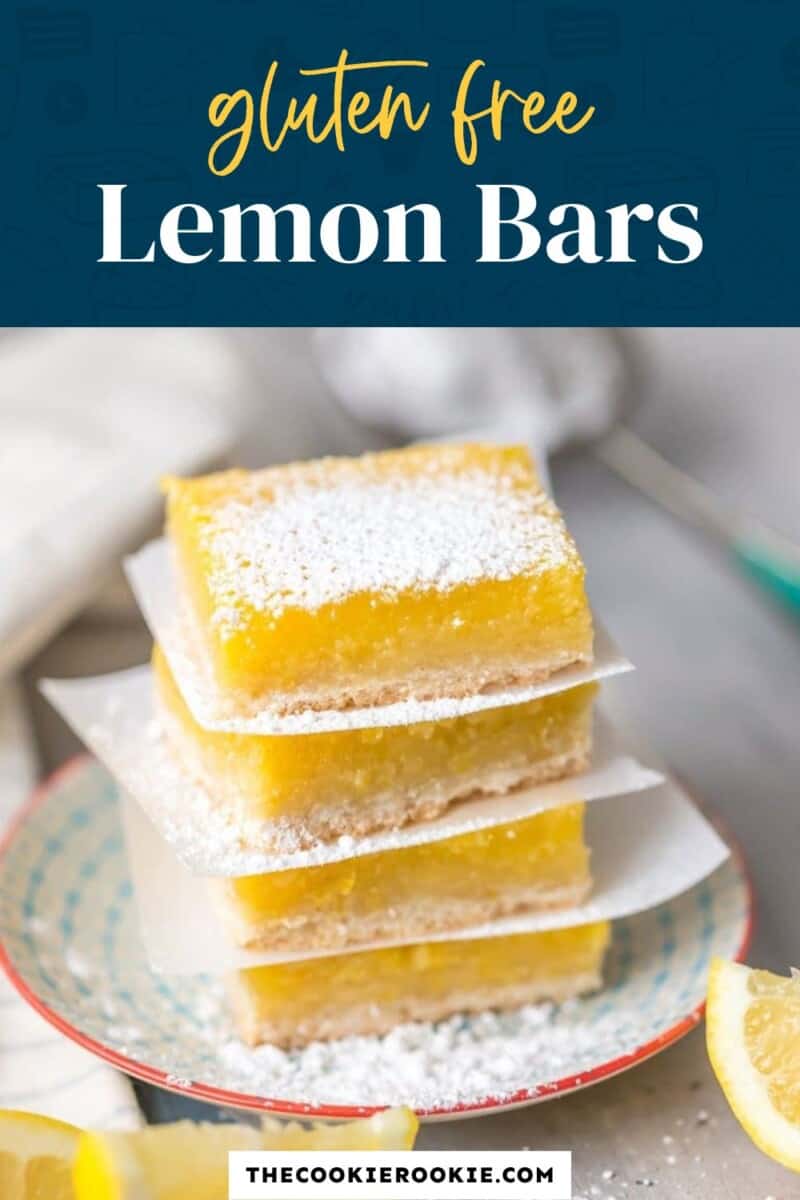

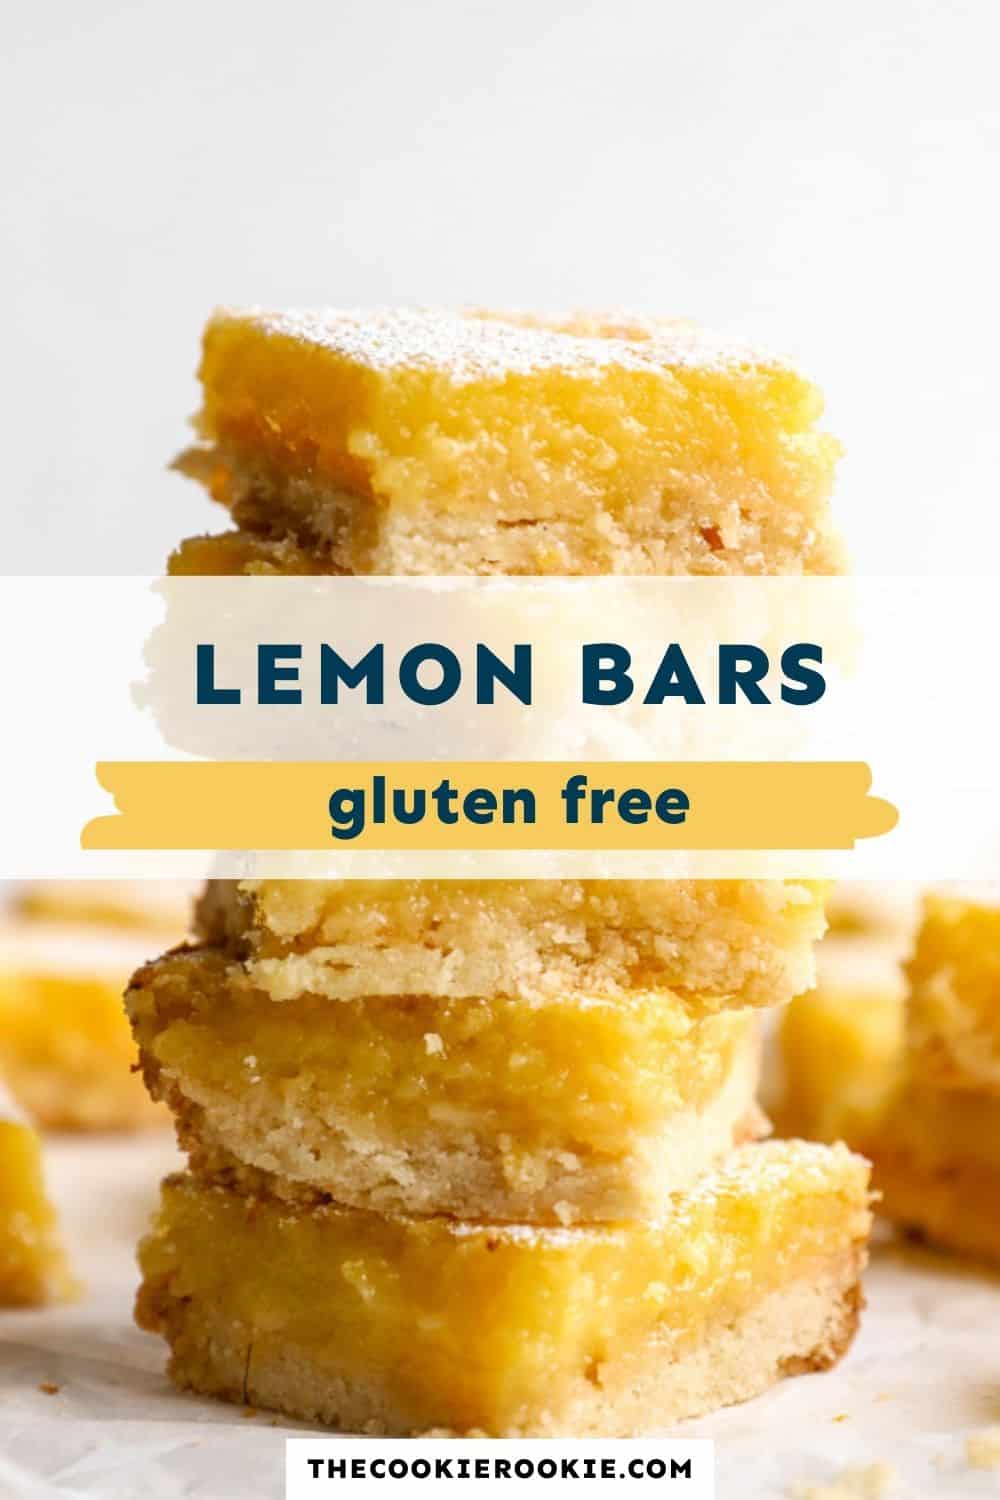

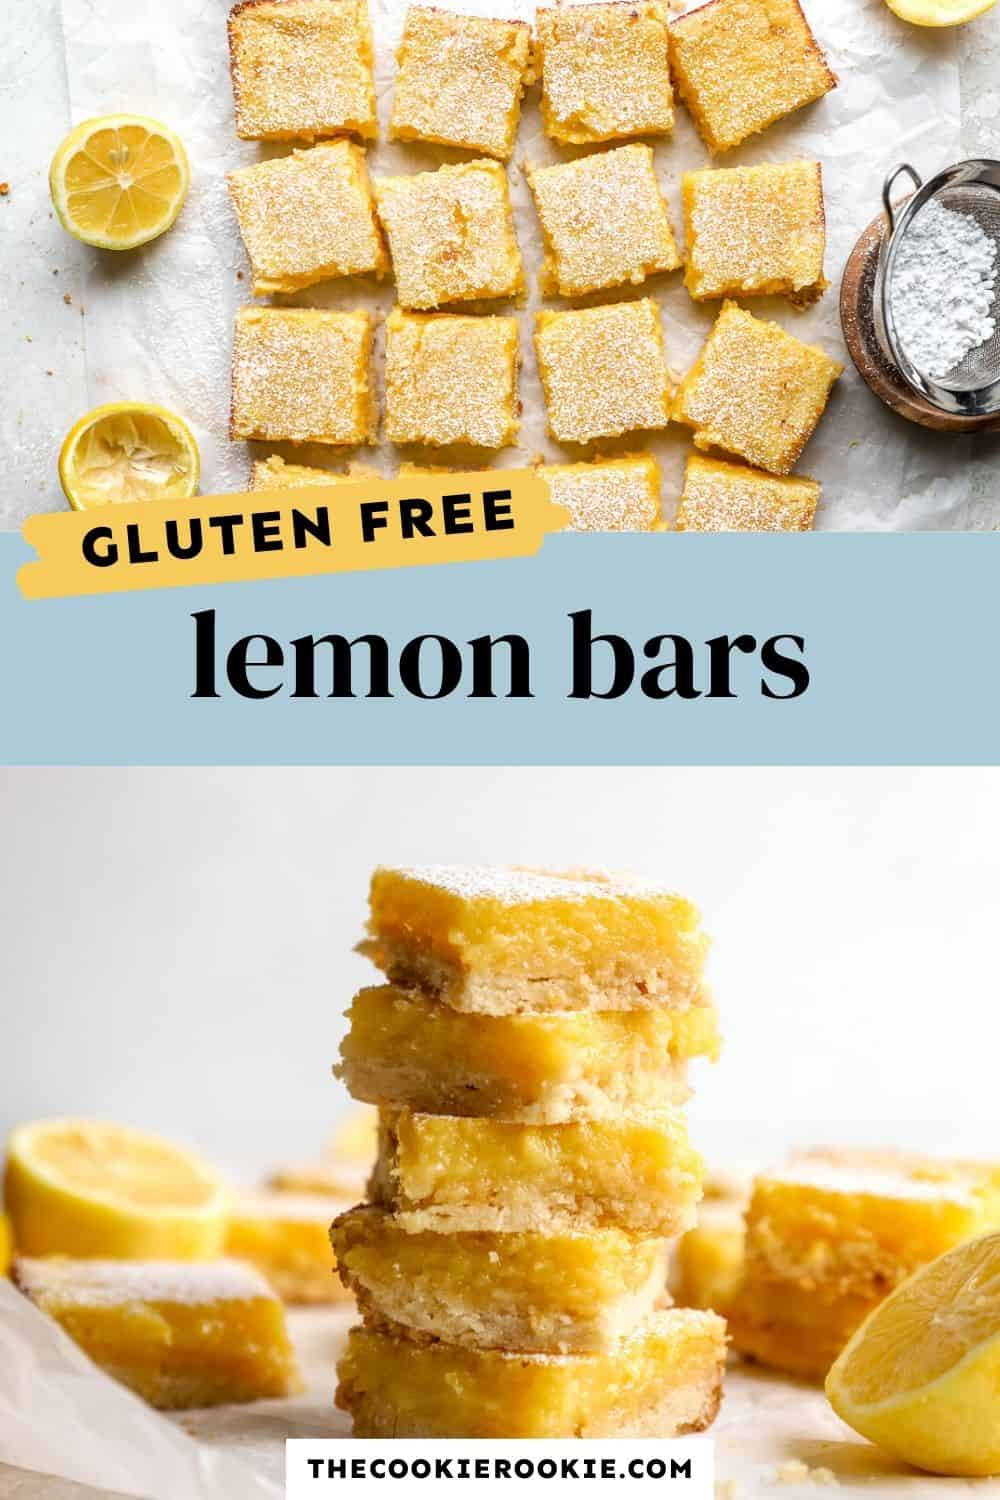
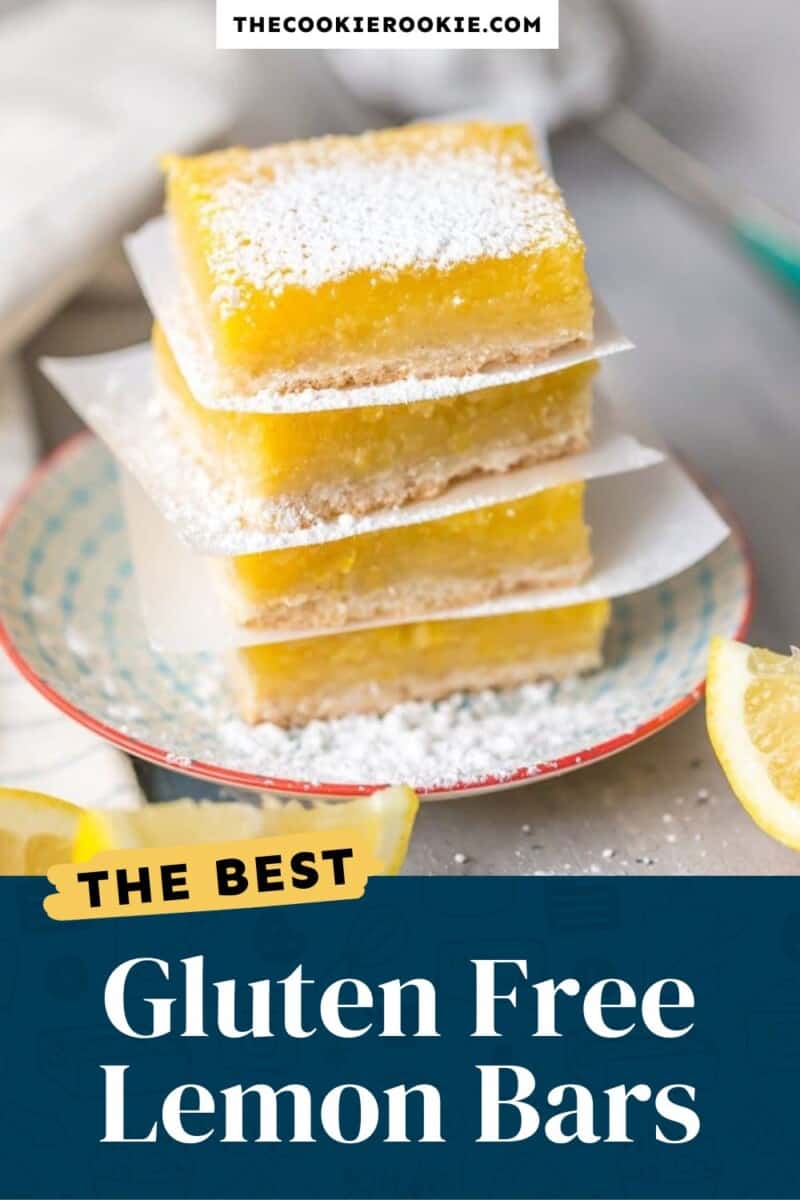
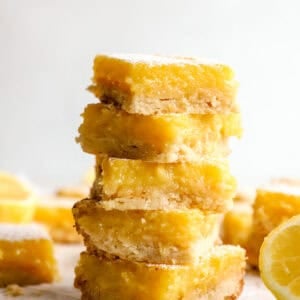
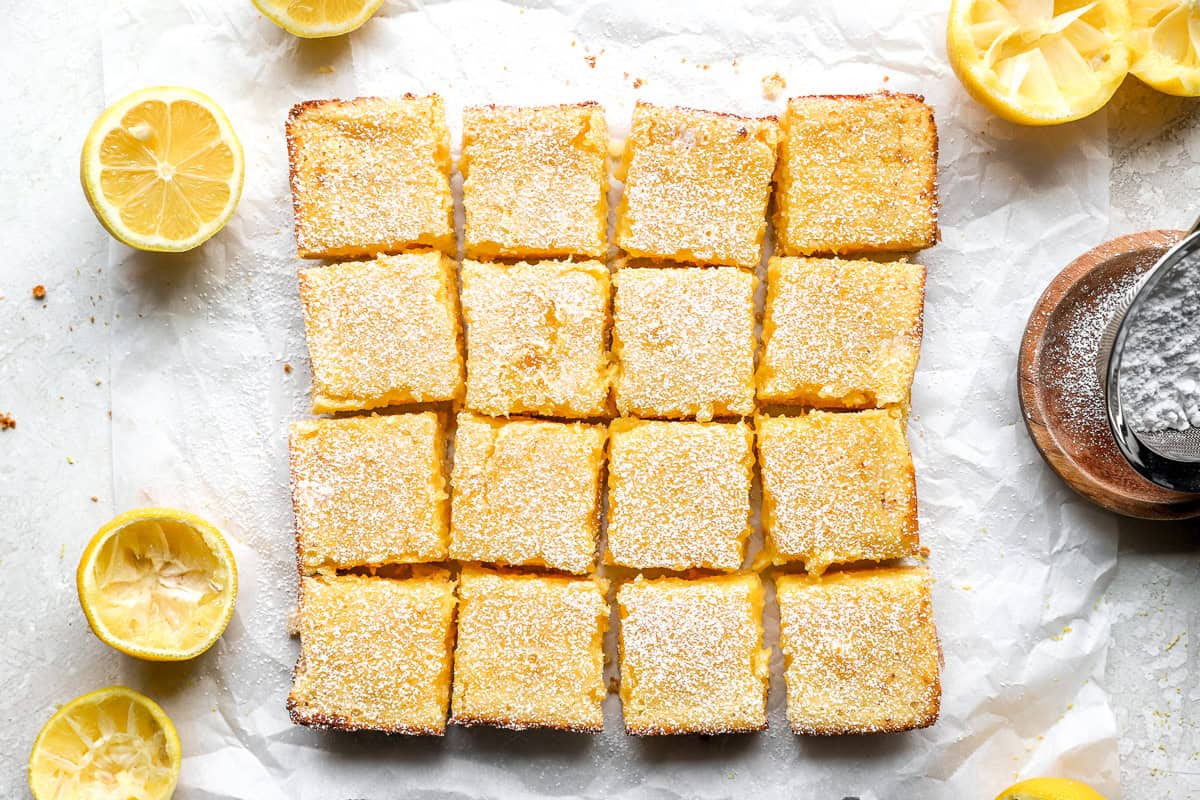
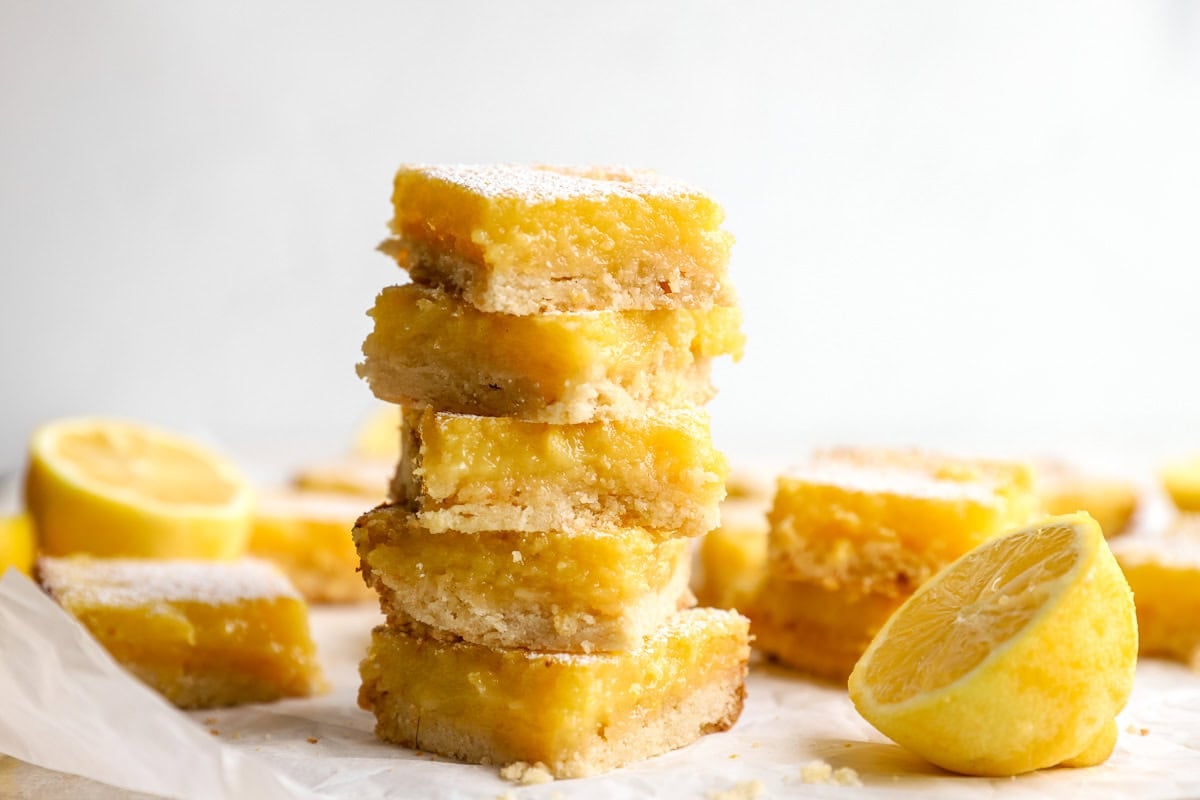
Gluten-free lemon bars are one of those desserts that feel simple but taste incredibly special. They have a buttery gluten-free shortbread crust topped with a smooth, tangy lemon filling. Made with fresh lemon juice, lemon zest, eggs, and a reliable gluten-free flour blend. Each square holds together beautifully, with a firm, tender crust and a creamy lemon layer that sets into the perfect custard-like texture. This easy homemade dessert is perfect for spring, holidays, or anytime you’re craving something bright, fresh, and gluten-free.
 are the easiest and best lemon bar recipe, and they just so happen to be gluten free! These lemon squares are one of our favorite easy gluten free desserts. Thick, creamy, tart, and utterly delicious; The Best Lemon Bars you'll ever taste.")
5-Star Review
“These are better than any other lemon bars that I’ve ever had—even the kind with gluten and dairy. My husband prefers these over all other recipes (and he’s not gluten and dairy free), and my mom made a huge batch for my brother’s wedding. Definitely a keeper of a recipe!” – Selena
I love my classic lemon bars recipe so much that I knew I needed a gluten-free lemon bars version that was just as reliable and delicious. These gluten-free lemon squares have the same buttery shortbread crust and smooth, tangy lemon filling, but made with a gluten-free flour blend. I tested these several times to make sure the texture stayed firm but creamy, with clean slices and that bright lemon flavor I always crave. My kids absolutely devour these whenever I make them, and I usually have to hide a few pieces in the fridge so I can enjoy one later with my coffee. If you try these gluten-free lemon bars, I’d love to hear how they turn out for you in the comments.
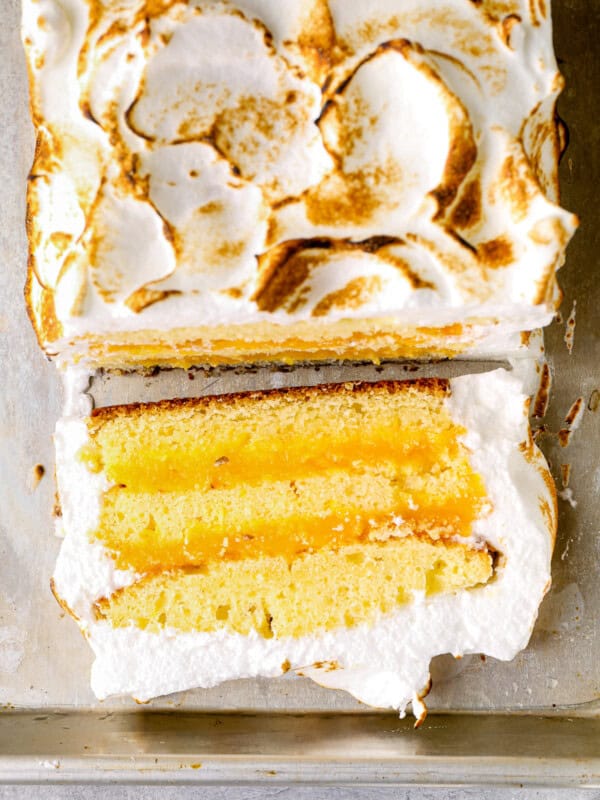
If you love lemon desserts as much as I do, this show-stopper lemon meringue cake is a must.
Tips for Beginners
- Press the crust firmly. I use the bottom of a measuring cup to really compact the crust so it holds together.
- Make sure the crust is fully baked before adding the filling. A properly baked crust prevents sogginess and keeps that classic shortbread texture intact.
- Lightly beat the eggs. If the eggs are beaten too aggressively, they trap air bubbles that rise to the surface during baking and can create a bubbly, uneven top or a slightly spongy texture. Lightly beating them just until the yolks and whites are fully combined ensures the filling stays silky, creamy, and custard-like.
- Use fresh lemon juice and zest for the best flavor and texture. Fresh lemons give these bars their bright, clean citrus flavor. I tested bottled juice, and the filling tasted flatter and didn’t set quite as smoothly.
- Bake until the center looks set, not liquid. The filling should no longer jiggle when you gently shake the pan. It may still look soft, but it will continue to firm up as it cools.
- Let the lemon squares cool completely, then chill before slicing. This is the biggest game-changer. The filling fully sets as it cools, which gives you clean, sharp slices instead of a soft or messy center. I let it sit on the counter for 2 hours before slicing.
Gluten-Free Lemon Bars Recipe
Ingredients
For the Crust
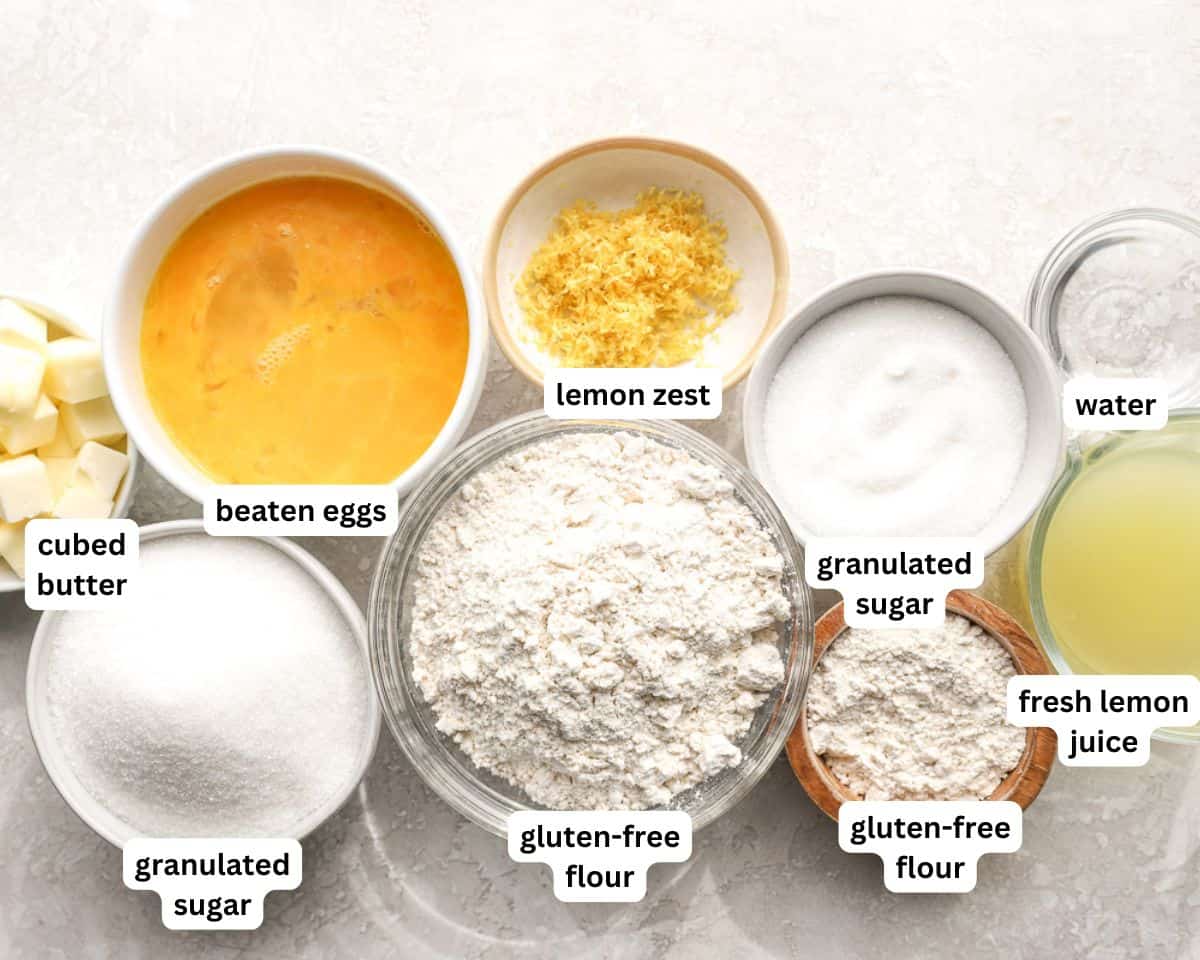
- 1½ cups gluten free flour 222g
- ½ cup granulated sugar 100g
- ½ cup salted butter 113g, cold and cut into pieces (1 stick), dairy-free butter works well
- 2 tbsp water 28 ml
For the Filling
- 1½ cups granulated sugar 300g
- ½ cup lemon juice* 118ml (from 4 lemons, Meyer lemons provide a sweeter flavor)
- 2 tbsp grated lemon zest* 12g (from 2 lemons), add extra zest for a stronger lemon flavor
- 4 large eggs lightly beaten
- ¼ cup gluten free flour 37g
For Serving
- powdered sugar** optional
Video
Instructions
For the Crust
- Preheat oven to 350°F. Spray a 9×9-inch baking pan with nonstick spray and set aside. (I also like to line with foil and then spray. It makes pulling them out of the pan much easier.)
- In a medium bowl, combine the flour and sugar. Use a fork or knivesto stir in the butter until a crumbly mixture results. Add the water a bit at a time. Take mixture and press evenly into the bottom of the pan.1½ cups gluten free flour, ½ cup granulated sugar, ½ cup salted butter, 2 tbsp water
- Bake for approximately 25 minutes until slightly golden and set.
For the Filling
- In a large bowl, stir together all of the filling ingredients until smooth.1½ cups granulated sugar, ½ cup lemon juice*, 2 tbsp grated lemon zest*, 4 large eggs, ¼ cup gluten free flour
- Pour mixture over the still-hot crust.
- Bake 22-26 minutes, or until set in the middle. Let cool on the counter for a minimum of 2 hours. Cut into squares and sprinkle with powdered sugar.powdered sugar**
Equipment
- Kitchen Scale (optional)
- 9×9-inch Baking Pan
Becky’s Tips
Nutrition information is automatically calculated, so should only be used as an approximation.
How to Make Gluten-Free Lemon Bars Step by Step
Gather the ingredients: Gather all the ingredients together. Preheat your oven to 350°F. Spray a 9×9-inch baking pan with nonstick spray, then line it with foil and spray again to make removal easier later.
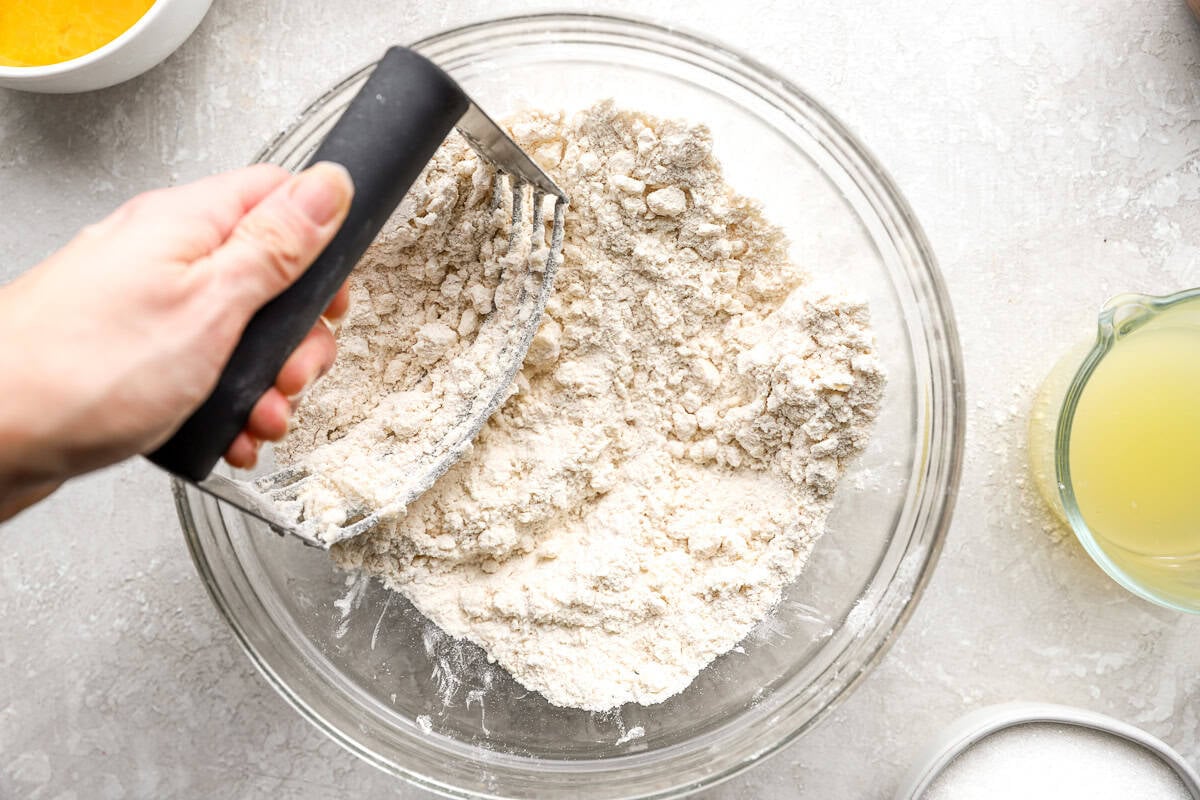
Make the crust: In a medium mixing bowl, combine 1½ cups (222g) gluten-free flour and ½ cup (100g) granulated sugar, stirring until evenly mixed. Add ½ cup (113g) cold salted butter, cut into small pieces, and use a fork, pastry cutter, or your fingers to work the butter into the flour mixture until it resembles coarse crumbs with small pea-sized pieces of butter throughout.
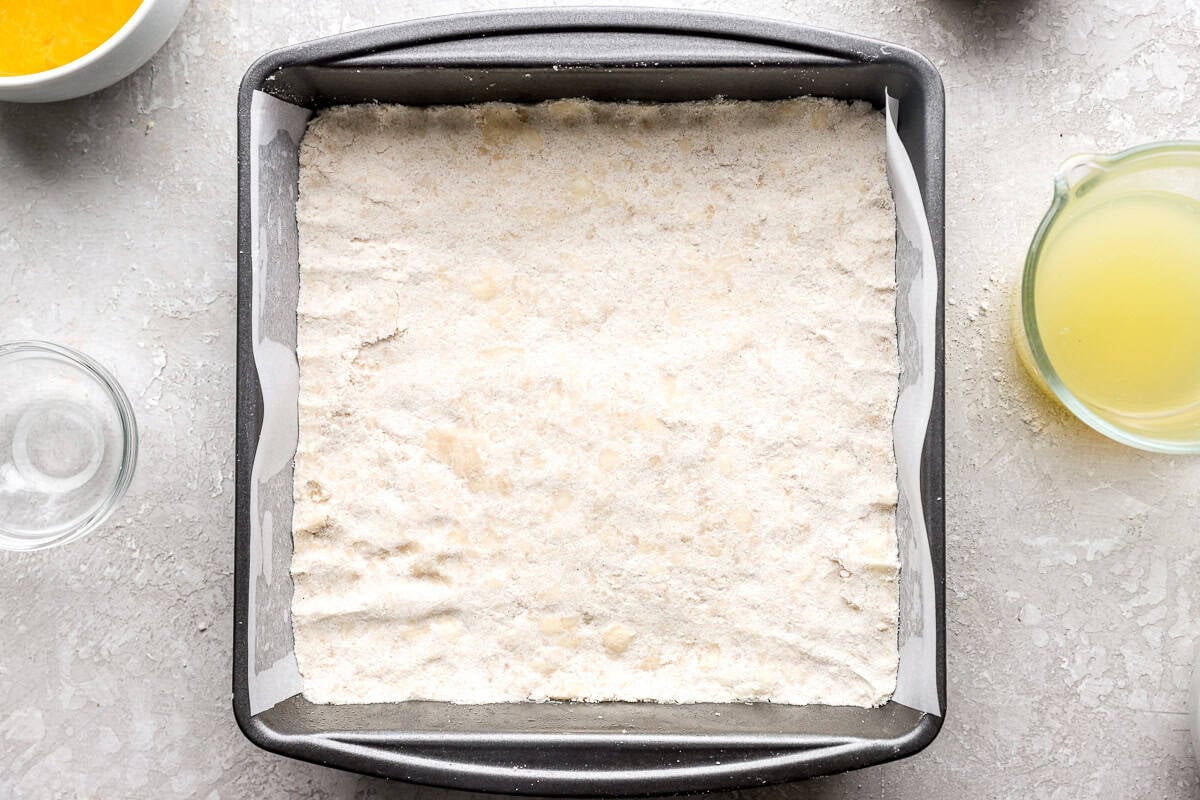
Press the dough into the pan: Add 2 tbsp (28ml) water, one tbsp at a time, gently mixing until the dough starts to come together. The mixture should look crumbly but hold together when pressed between your fingers. Transfer the dough to the prepared pan and press it firmly and evenly into the bottom, using the bottom of a measuring cup or glass to compact it into a smooth, tight layer.
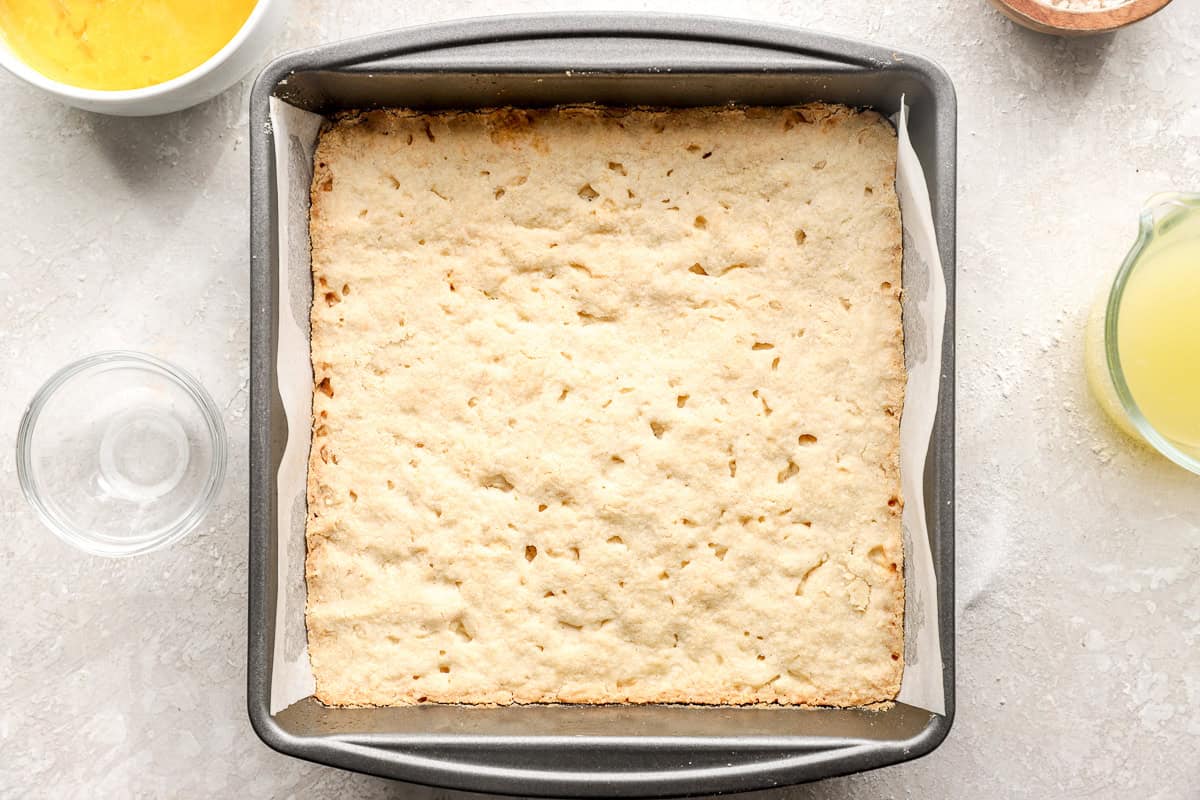
Bake the crust: Bake for about 25 minutes, or until the crust looks set, dry on the surface, and lightly golden around the edges.
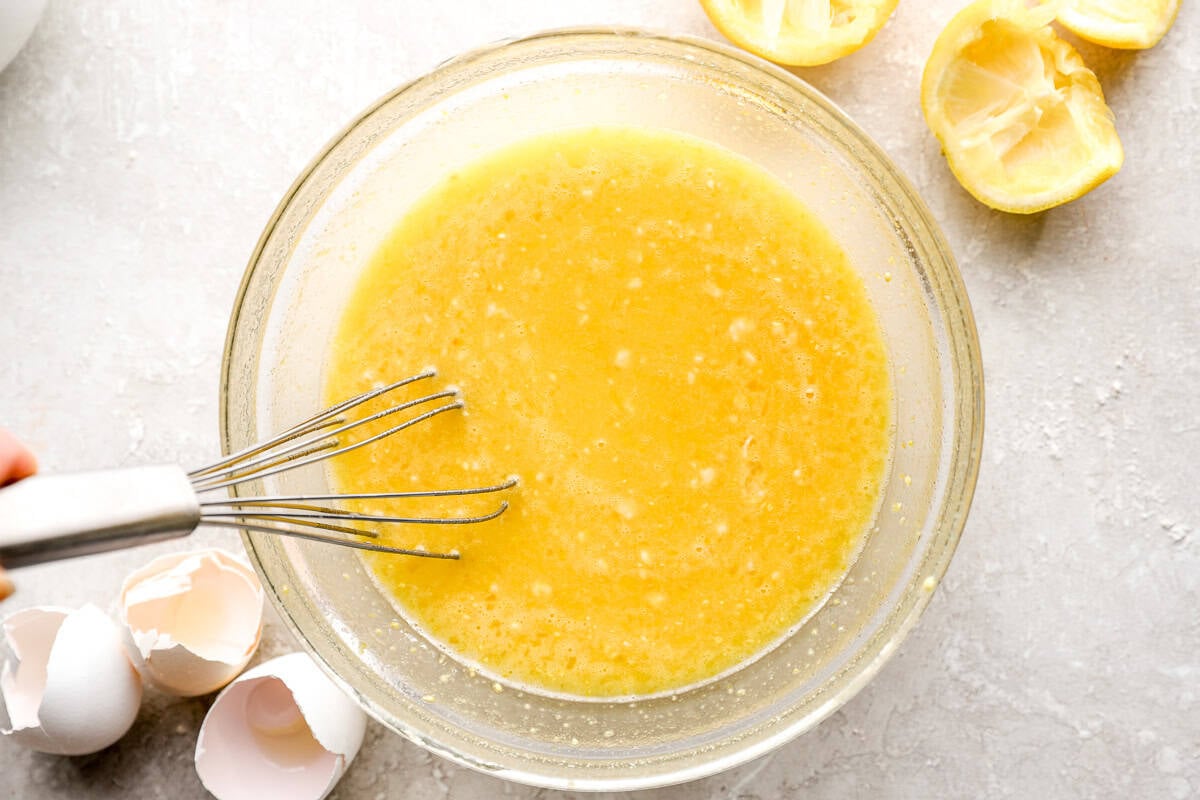
Make the lemon filling: While the crust bakes, prepare the filling. In a large bowl, lightly beat 4 large eggs. Once beaten, whisk in 1½ cups (300g) granulated sugar, ½ cup (118 ml) fresh lemon juice, and 2 tbsp (12g) grated lemon zest until fully combined, and the mixture looks smooth, pale yellow, and slightly glossy. Sprinkle in ¼ cup (37g) gluten-free flour and whisk until completely smooth with no visible lumps. The filling will be thin and pourable.
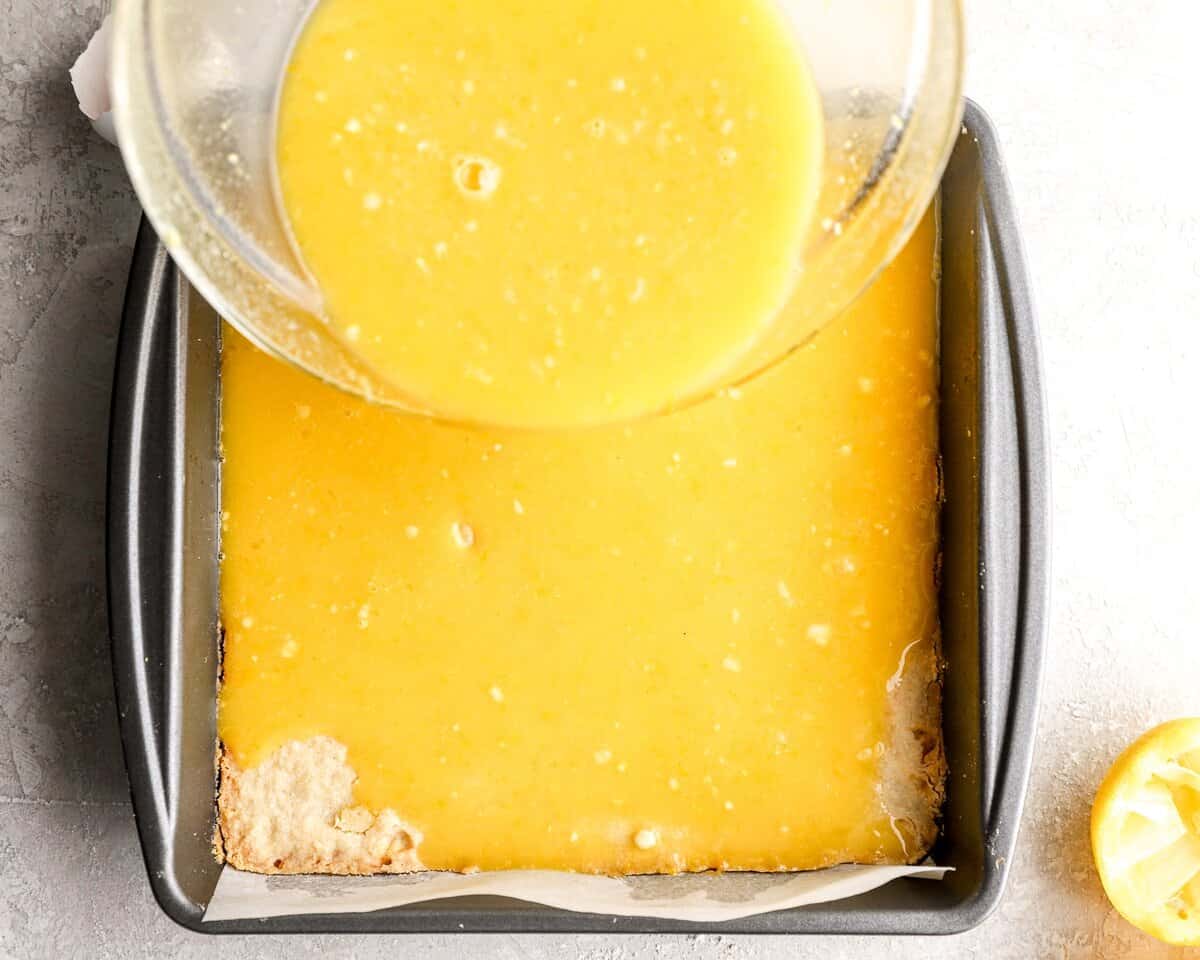
Add filling to the hot crust: Pour the lemon filling evenly over the hot crust immediately after removing it from the oven.
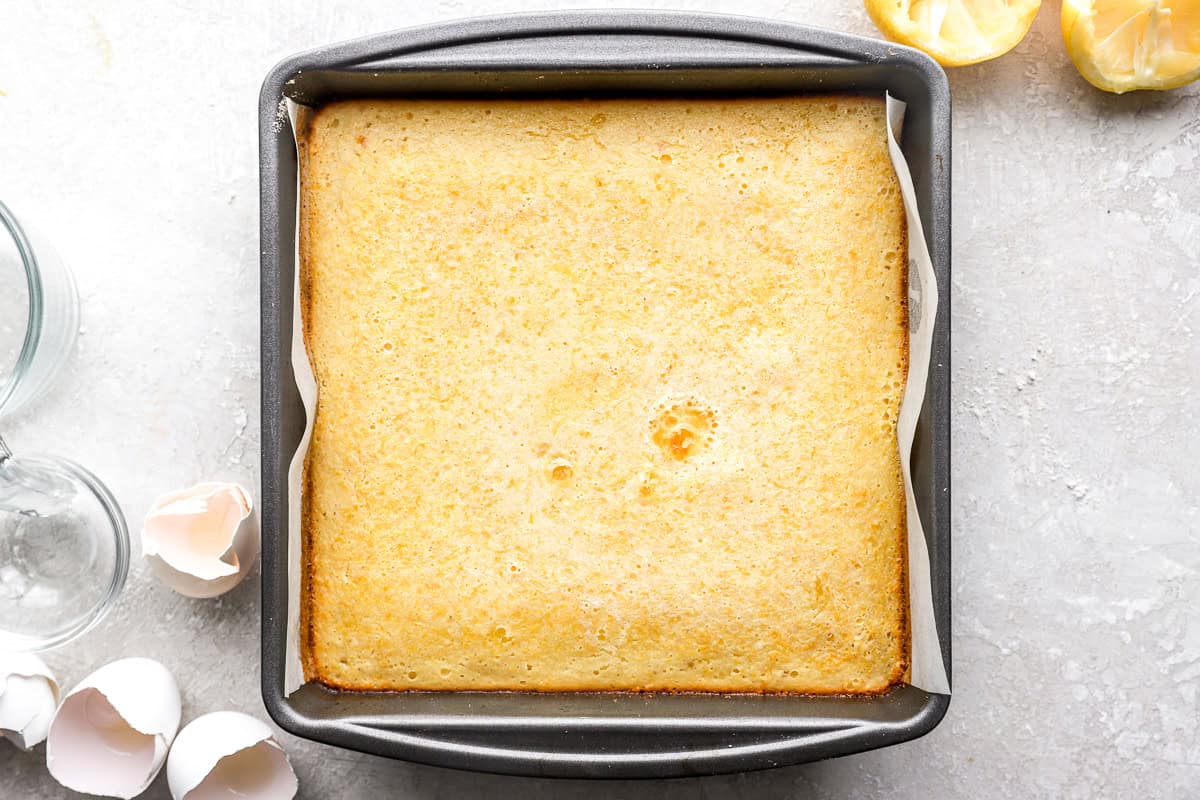
Bake until set: Return the pan to the oven and bake for 22–26 minutes, or until the center looks set and no longer jiggles when gently shaken. The surface should look smooth and fully baked, with no wet spots.
Cool and slice: Let the bars cool completely at room temperature for at least 2 hours, then transfer to the refrigerator to chill for cleaner slices. Once fully cooled and chilled, cut into squares and dust with powdered sugar, if desired, just before serving.
Gluten-Free Lemon Bar Variations
- Blueberry Lemon Bars: Stir a cup of fresh blueberries into the filling, or add a thin layer of blueberry jam between the crust and the curd.
- Raspberry Lemon Bars: Stir a cup of fresh raspberries into the filling, or add a thin layer of raspberry jam between the crust and the curd.
- Cranberry Lemon Bars: Stir a cup of fresh cranberries into the filling, or cook down some cranberries and sugar into a cranberry jam!
- Meyer Lemon Bars: Use Meyer lemon juice and zest. (Love this special flavor!)
- Gluten Free Lemon Bars with Graham Cracker Crust: Pulse a few sheets of gluten-free graham crackers in a food processor and use them in place of the flour.
How to Store and Reheat
These gluten-free lemon bars are perfect for making ahead because the texture improves as they chill. After baking, let the bars cool completely, then refrigerate them overnight for the cleanest slices and best flavor.
Store leftovers in an airtight container in the refrigerator for up to 5 days, where they’ll stay firm and fresh. You can leave them at room temperature for up to 4 hours while serving, but they should be returned to the refrigerator afterward.
These bars also freeze beautifully. Wrap the whole slab or individual slices tightly in plastic wrap, place them in a freezer-safe bag or container, and freeze for up to 3 months. Thaw overnight in the refrigerator before serving.
Serving Suggestions
I love serving these gluten-free lemon bars in the spring, especially for Easter, baby showers, or when I’m putting together a simple brunch spread. The bright lemon flavor pairs perfectly with savory dishes like ham and cheese croissants or eggs Benedict casserole, and they add such a fresh, vibrant touch to the table. I usually dust them with powdered sugar right before serving and sometimes add fresh berries or a dollop of whipped cream for an extra special finish. They’re also perfect with a cup of coffee or tea, whether you’re hosting guests or just enjoying a quiet afternoon treat.
More Gluten-Free Bakes
- Gluten-Free Brownies: These gluten-free brownies are rich and fudgy. They’re a great option when you want another reliable gluten-free dessert with a perfectly set texture and easy, clean cuts.
- Gluten-Free Biscuits: Soft, tender, and made with a dependable gluten-free flour blend. If you’re building out your gluten-free baking basics, they’re a great savory option to pair alongside desserts like these lemon bars.
- Gluten-Free Chocolate Chip Cookies: Chewy, buttery, and just as satisfying as the classic version. They’re perfect when you want another easy gluten-free dessert that delivers great texture and flavor every time.
More citrus desserts to try

Our Gluten-Free Lemon Bars recipe was originally published 3/15/18. It was retested, reworked, and republished to be better than ever 3/28/26.


How long would these last if I make them ahead of time? My daughter is GF and I want to make them a couple days ahead for her shower.
Hi Dawn, you can store leftovers in the fridge for up to 5 days.
I’ve been baking for a long time, but I’m new to gluten free baking, I know that there are different combinations for gluten free four and I was wondering what Gluten Free flour did you use for this recipe?
Hi Brenda, for this we used the GF flour from Target’s Good & Gather brand.
Can I use pre-cooked lemon curd? If so how?
We recommend baking the crust until it is nearly fully cooked, then adding the lemon curd and baking again for a shorter period!
This recipe turned out perfectly! I love it when I knock gf baking out of the park and this recipe did just that.
I didn’t have bobs redmill flour on hand so I used the all-purpose gf flour recipe from canelle et vanille bakes simple: 173g brown rice flour+ 62g potato starch+ 25g tapioca starch, whisked together well then divided for the filling (37g) and crust (222g).
Thanks so much for sharing your GF flour substitute, Emily!
Hmm it looks like a cake not like the pic :/ Not glossy and yellow but opaque and white
Hi, it sounds like you may have whisked the eggs too much, which can introduce air and that cakelike texture and color. Mix until just combined, not light and airy, next time!
These are better than any other lemon bars that I’ve ever had– even the kind with gluten and dairy. My husband prefers these over all other recipes (and he’s not gluten and dairy free), and my mom made a huge batch for my brother’s wedding. Definitely a keeper of a recipe!
Hello, I just made these for the first time. They taste really good but is the filling supposed to be on the softer side?
Hi Christine, they will set up more firmly in the refrigerator if that’s what you’re looking for!
These were VERY good! They have a lot of lemony flavor without being too sour, and the crust was excellent. My Gluten Free friends really appreciated that the crust was slightly crunchy, light, and buttery. Perfect, and they are now my go-to lemon bar recipe!
These are fabulous. The crust is crispy and buttery and the texture and flavor is exactly what I was hoping for. I made a trial batch for my coworkers, so they’ll be the true test. I’m making more for my daughter’s bridal shower this weekend.
Hi Selleck! I make this recipe all the time but I always double the filling as it’s never enough. Or I half the base so it’s a better ratio! Hope that helps :)