Updated


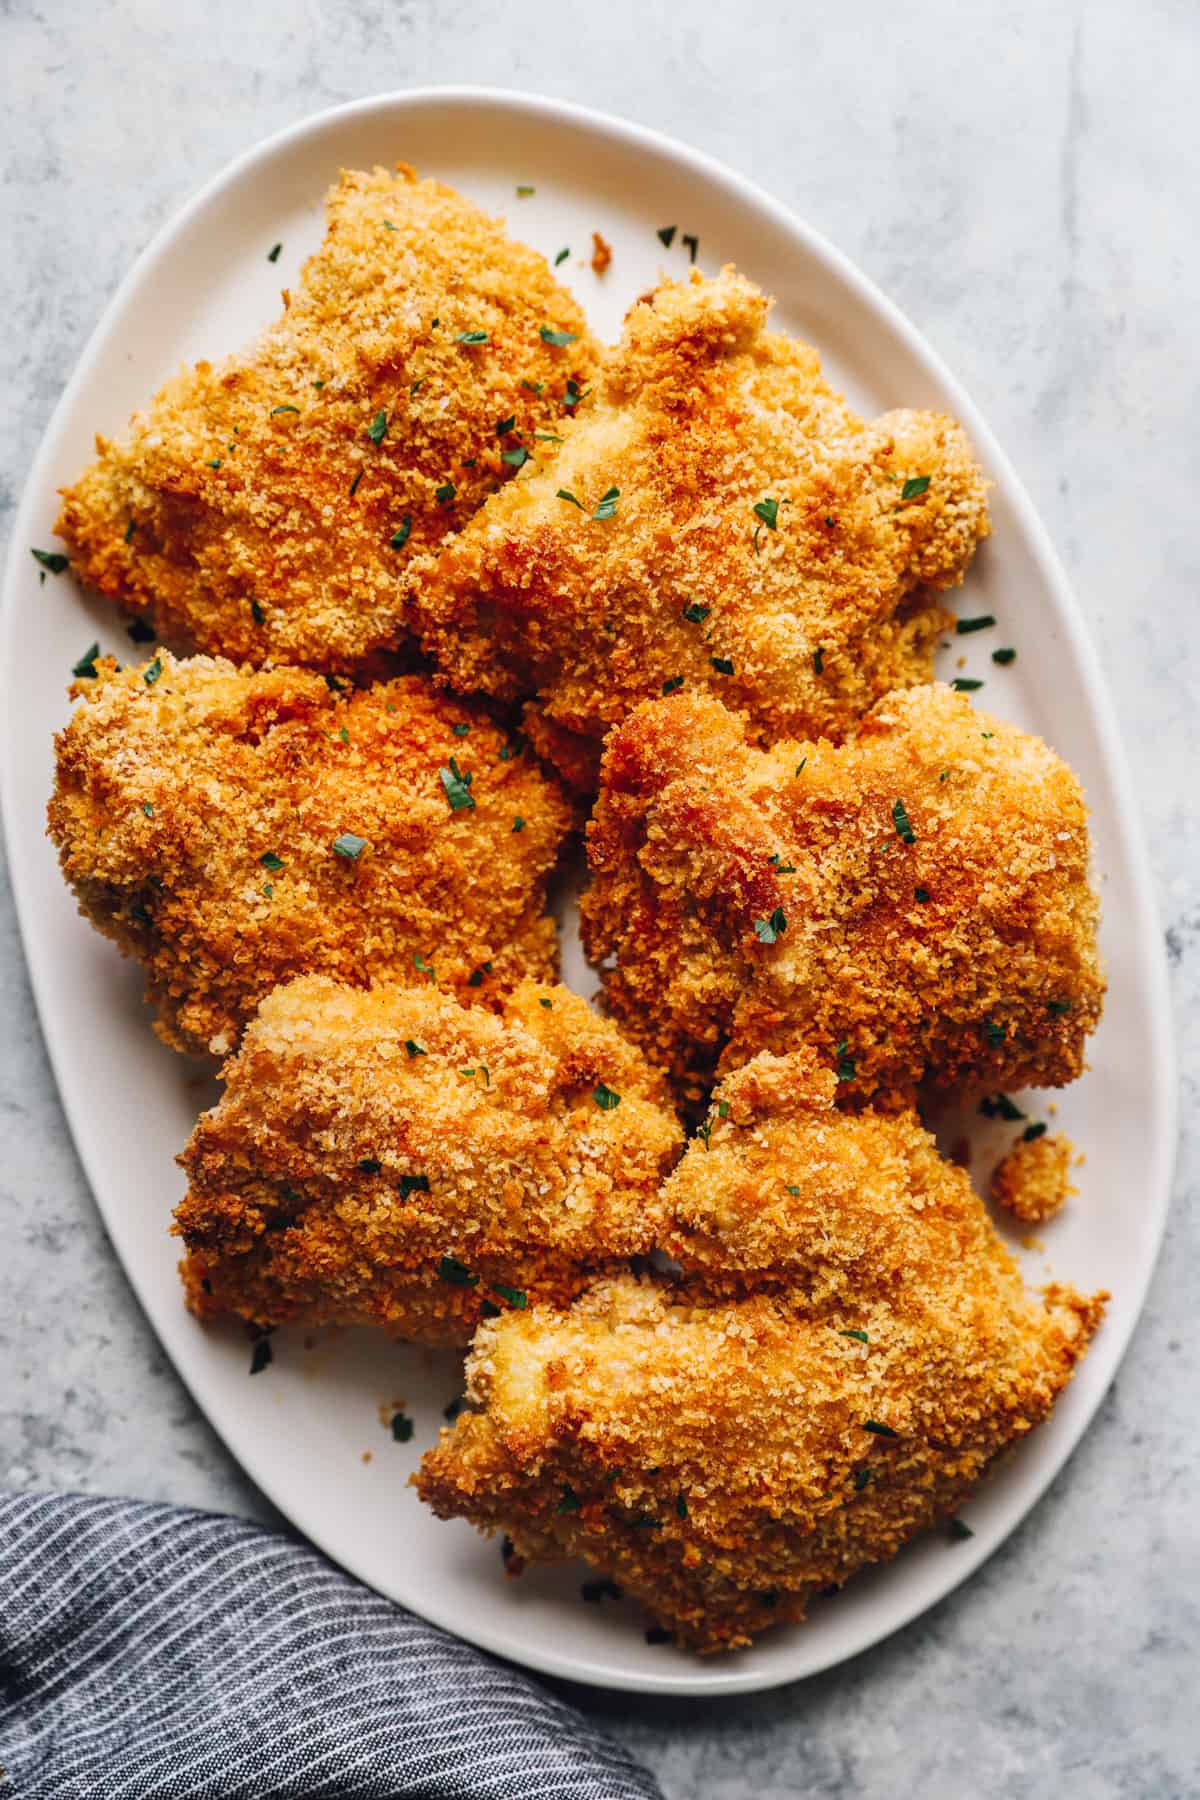
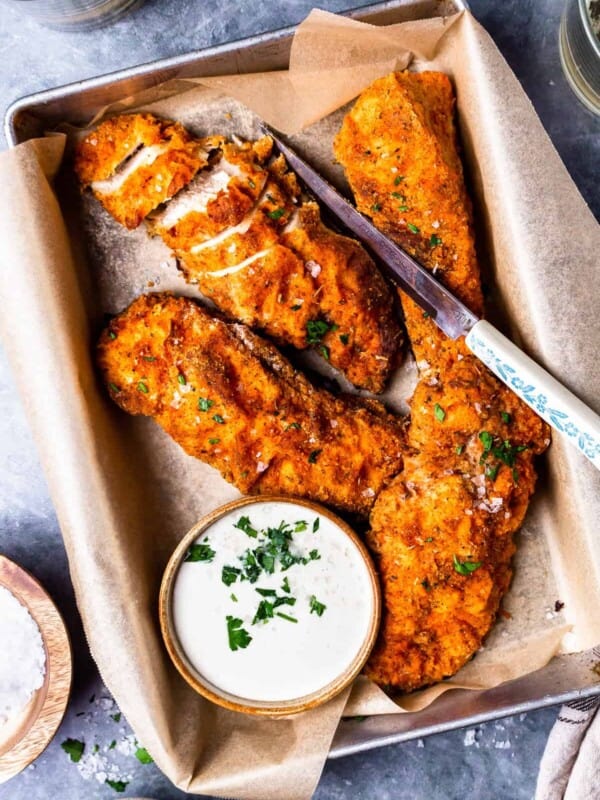
These Crispy Chicken Thighs are breaded in a seasoned breadcrumb mixture and baked in the oven until golden brown. Dredging boneless thighs in panko breadcrumbs gives them a beautifully crunchy, oven-fried texture. This easy recipe yields juicy, ultra-crisp, and flavorful chicken thighs every time!
5-Star Review
“Awe man these are some awesomeness! Steps are easy, eating them is bliss. Healthier version of fried chicken.” – Laurette
Breaded Chicken Thighs
I make chicken all the time because it’s affordable, versatile, and easy to work into weeknight meals, but it can start to feel repetitive. That’s exactly why I started testing different ways to change up my usual baked chicken thighs, but still keep them healthier than fried chicken. These breaded chicken thighs are one of my favorite upgrades. I coat the chicken in seasoned panko breadcrumbs using a simple dredging method that helps the breading actually stick and crisp up properly. Then I roast them at a higher temperature so the outside gets golden and crunchy while the inside stays juicy and tender. It’s an easy technique that gives you that fried-style texture without the extra oil, and it’s become one of the most reliable ways I keep chicken from getting boring.
Tips for Beginners
- Let the chicken rest before serving. Resting helps the juices redistribute and allows the breading to set, so it stays crisp instead of sliding off.
- Pat the chicken completely dry before breading. Any moisture will prevent the coating from sticking and crisping. Dry chicken is the foundation of a crispy result.
- Skin-on vs skinless. My goal with this recipe is to make a much healthier version of “fried” chicken thighs by baking. Since skin adds more fat and calories, I prefer to use skinless thighs. The breading adds plenty of crispiness!
- Follow a proper dredging method so the breading sticks. Set up three bowls: one with flour, one with beaten eggs, and one with seasoned panko. First, lightly coat the chicken in flour and shake off any excess. This gives the egg something to grip. Next, dip it into the egg, making sure it’s fully coated with no dry spots. Finally, press it firmly into the panko, turning and pressing so the breadcrumbs fully adhere on all sides. Don’t just sprinkle the coating on—pressing it in is what helps it stay put and crisp up in the oven.
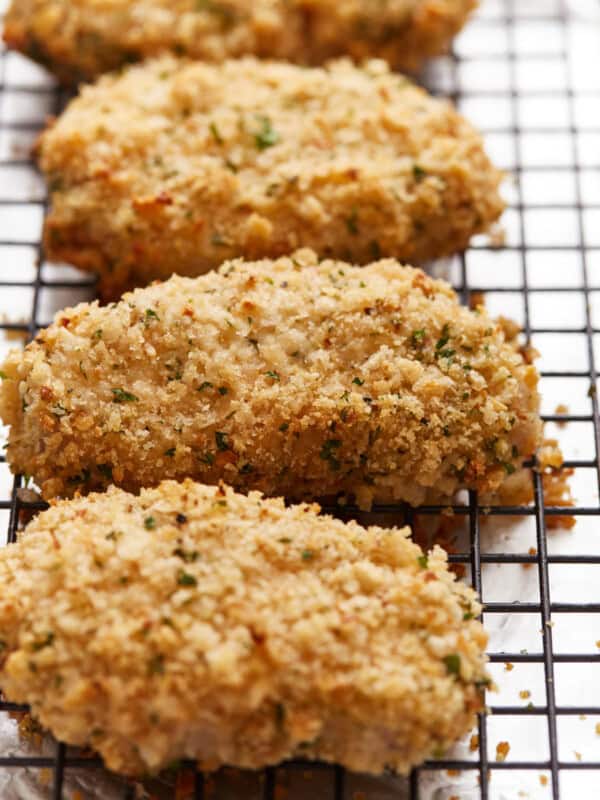
- Use panko breadcrumbs for the best crunch. Panko is lighter and airier than regular breadcrumbs, which is what gives these chicken thighs that crispy, golden texture in the oven.
- Bake at a higher temperature to mimic frying. A hot oven helps the exterior crisp up quickly while the inside stays juicy. Lower temps will dry the chicken out before it browns.
- Don’t overcrowd the pan. Leave space between each piece so the heat can circulate. If they’re too close together, the chicken will steam instead of being crisp.
- Cook to 175–185°F for tender dark meat. Chicken thighs are best slightly above the standard 165°F. This higher range breaks down the fat and connective tissue for better texture.
Crispy Chicken Thighs Recipe (Baked and Breaded)

Ingredients
- 1 cup all-purpose flour
- 1½ tsp salt divided
- ¼ tsp ground black pepper
- 2 large eggs
- 2 tbsp water
- 2 cups Panko bread crumbs
- 1 tsp paprika
- ½ tsp garlic powder
- ½ tsp onion powder
- 2-2½ lbs boneless, skinless chicken thighs
- 2 tbsp olive oil
Video
Instructions
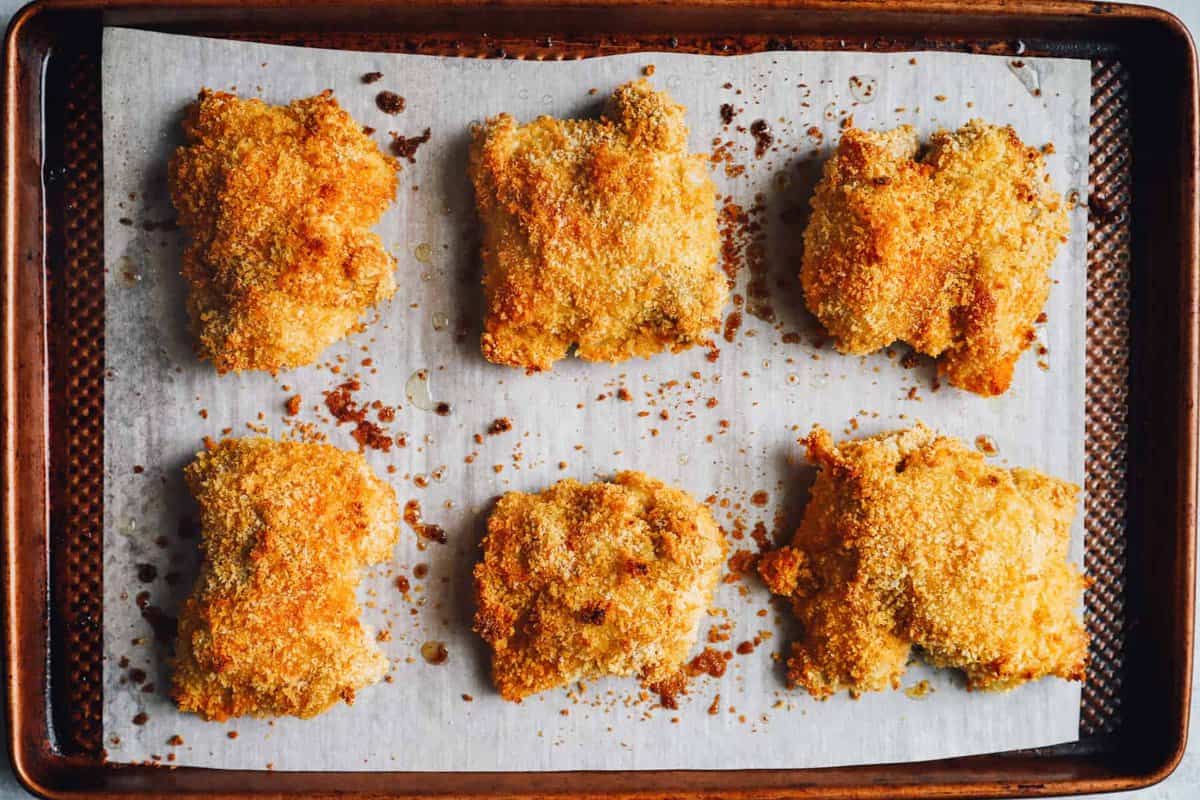
- Preheat oven to 400°F. Line a baking sheet with parchment paper. Set aside.
- Set out 3 separate bowls to create a breading station for the chicken. In the first bowl, combine the flour, ½ teaspoon salt, and pepper. In the second bowl, beat the eggs and water together. In the third bowl, combine the bread crumbs, remaining salt, paprika, garlic powder, and onion powder.1 cup all-purpose flour, 1½ tsp salt, ¼ tsp ground black pepper, 2 large eggs, 2 tbsp water, 2 cups Panko bread crumbs, 1 tsp paprika, ½ tsp garlic powder, ½ tsp onion powder
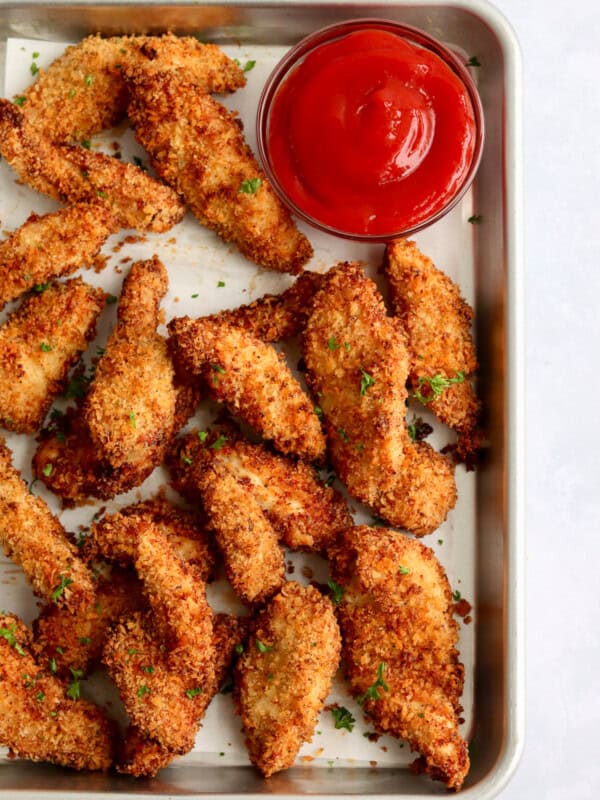
- Dredge each chicken thigh in the flour mixture. Make sure each thigh is fully coated. Dip the chicken thighs in the egg mixture and then in the seasoned bread crumbs.2-2½ lbs boneless, skinless chicken thighs
- Place the chicken thighs onto the prepared pan. Drizzle olive oil on top of the thighs.2 tbsp olive oil
- Bake for 20-25 minutes until the chicken is crispy and golden brown on the outside and the internal temperature of the chicken reaches 165°F. Serve and enjoy!
Becky’s Tips
- Instead of eggs, you can coat both sides of the chicken thighs in mayo before dipping them in the bread crumb mixture.
- For a little kick, add ½-1 teaspoon of cayenne pepper to the bread crumb mixture in step 2.
- If using bone-in thighs, increase the cooking time. They will need up to 10-15 extra minutes in the oven.
- Air Fryer: Prepare the thighs as directed and cook them in the air fryer for 12 minutes at 380°F. Make sure to flip them halfway through cooking!
- Other cuts: Instead of chicken thighs, use 2-2 ½ pounds of boneless, skinless chicken breasts. Adjust the bake time as needed (chicken breasts don’t take as long to cook as thighs).
Nutrition information is automatically calculated, so should only be used as an approximation.
How to Make Crispy Chicken Thighs Step by Step
Gather the ingredients: Gather all the ingredients together and preheat the oven to 400°F. Line a baking sheet with parchment paper so the chicken doesn’t stick and the coating crisps evenly.
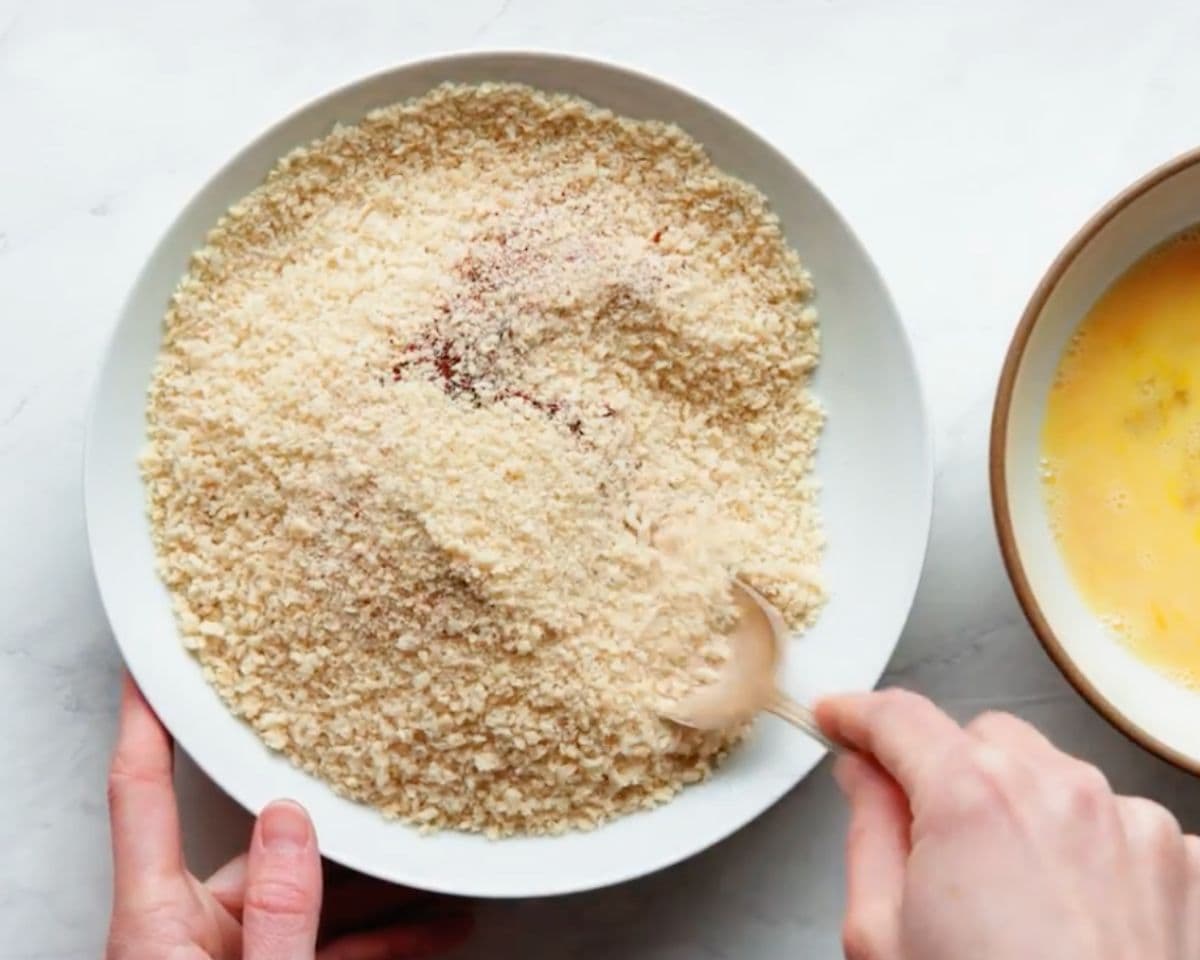
Set up your breading station: In the first bowl, whisk together 1 cup all-purpose flour, ½ tsp salt, and ¼ tsp black pepper until evenly combined. In the second bowl, beat 2 large eggs with 2 tbsp water until smooth and slightly frothy. In the third bowl, mix 2 cups panko breadcrumbs with the remaining 1 tsp salt, 1 tsp paprika, ½ tsp garlic powder, and ½ tsp onion powder until well distributed.
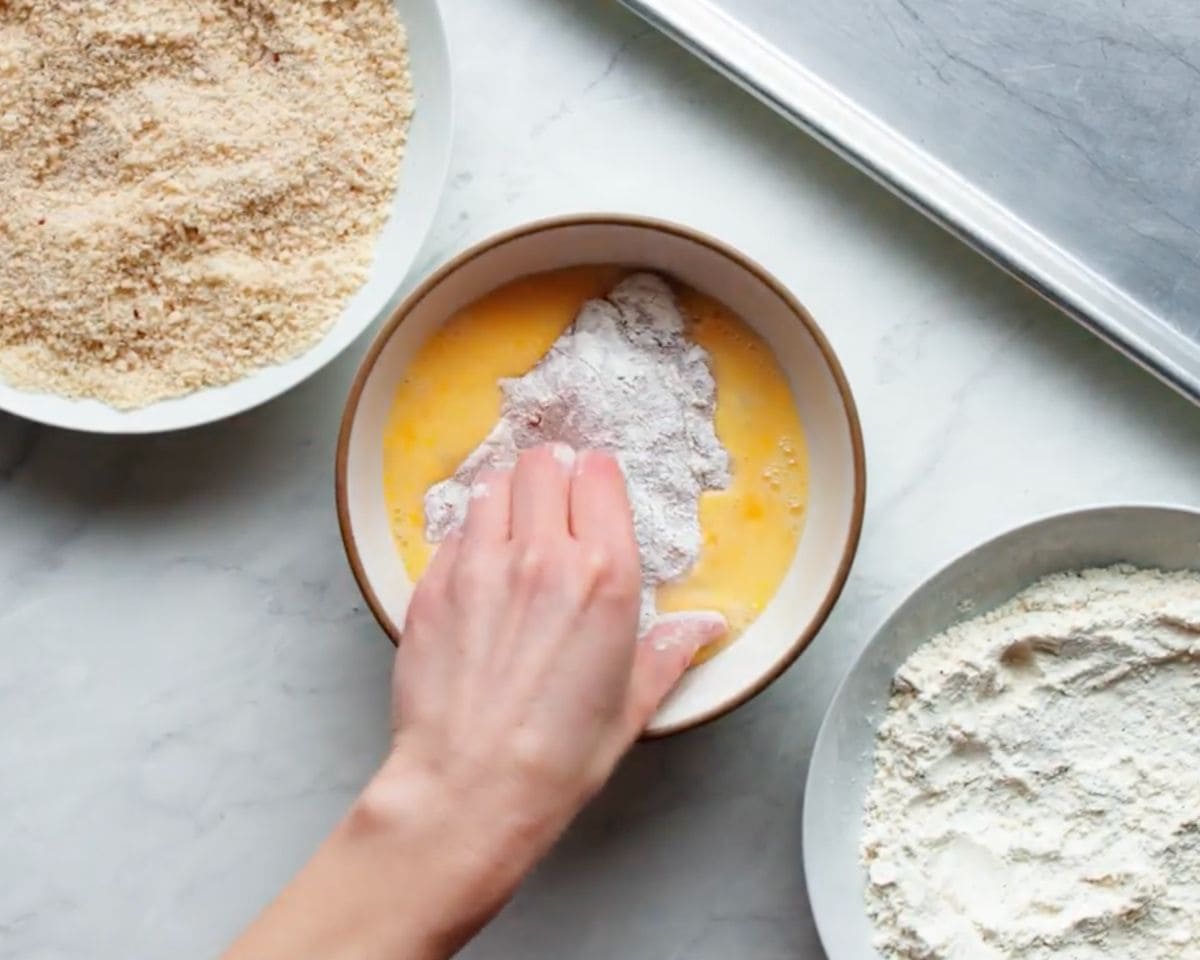
Dredge the chicken properly: Working with 2-2½ lbs boneless, skinless chicken thighs, coat each piece in the flour mixture first, making sure it’s fully covered, then shake off any excess. Dip into the egg mixture, letting any extra drip off so it doesn’t get soggy. Press firmly into the seasoned panko, turning and pressing so the breadcrumbs stick on all sides and create an even coating.
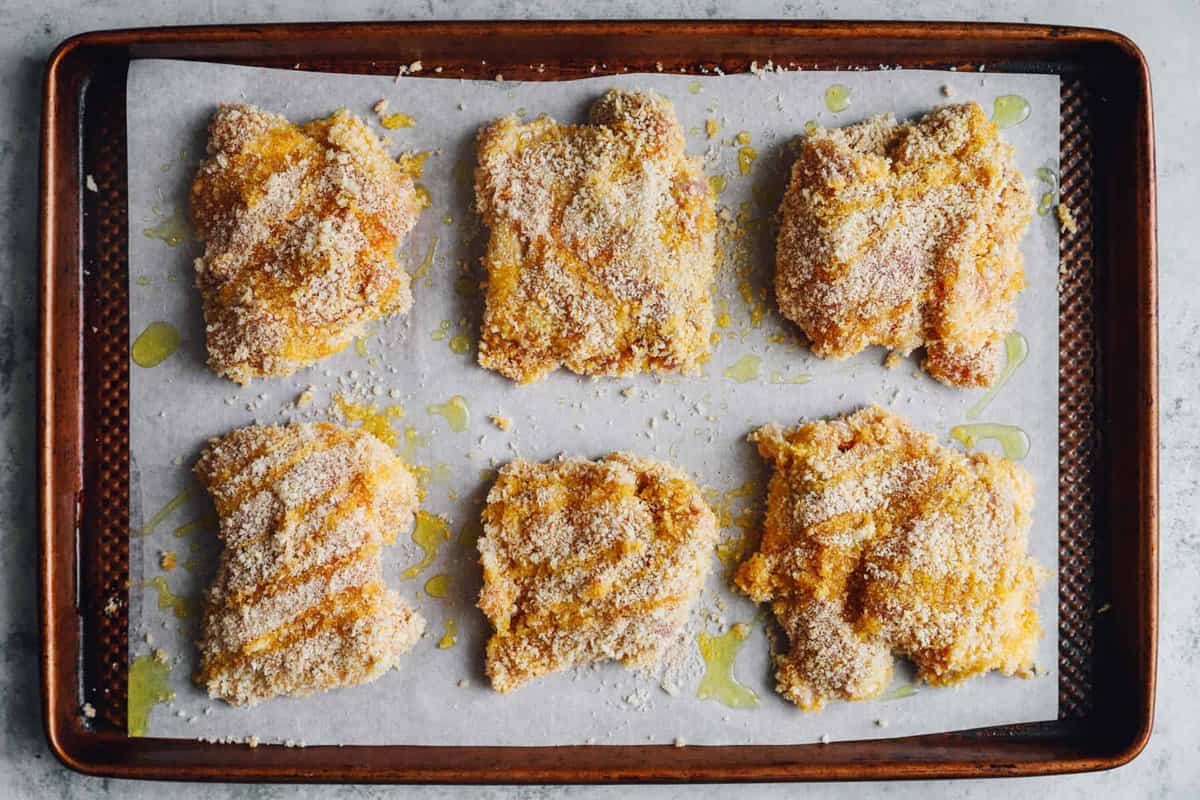
Arrange and add oil: Place the breaded chicken thighs on the prepared baking sheet, leaving space between each piece so they crisp instead of steam. Drizzle 2 tsp olive oil evenly over the tops to help the coating turn golden and crunchy.
Bake until crispy and cooked through: Bake for 20–25 minutes, until the coating is golden brown and crisp and the chicken reaches an internal temperature of 165°F–175°F. The outside should feel firm and crunchy, and the juices should run clear.
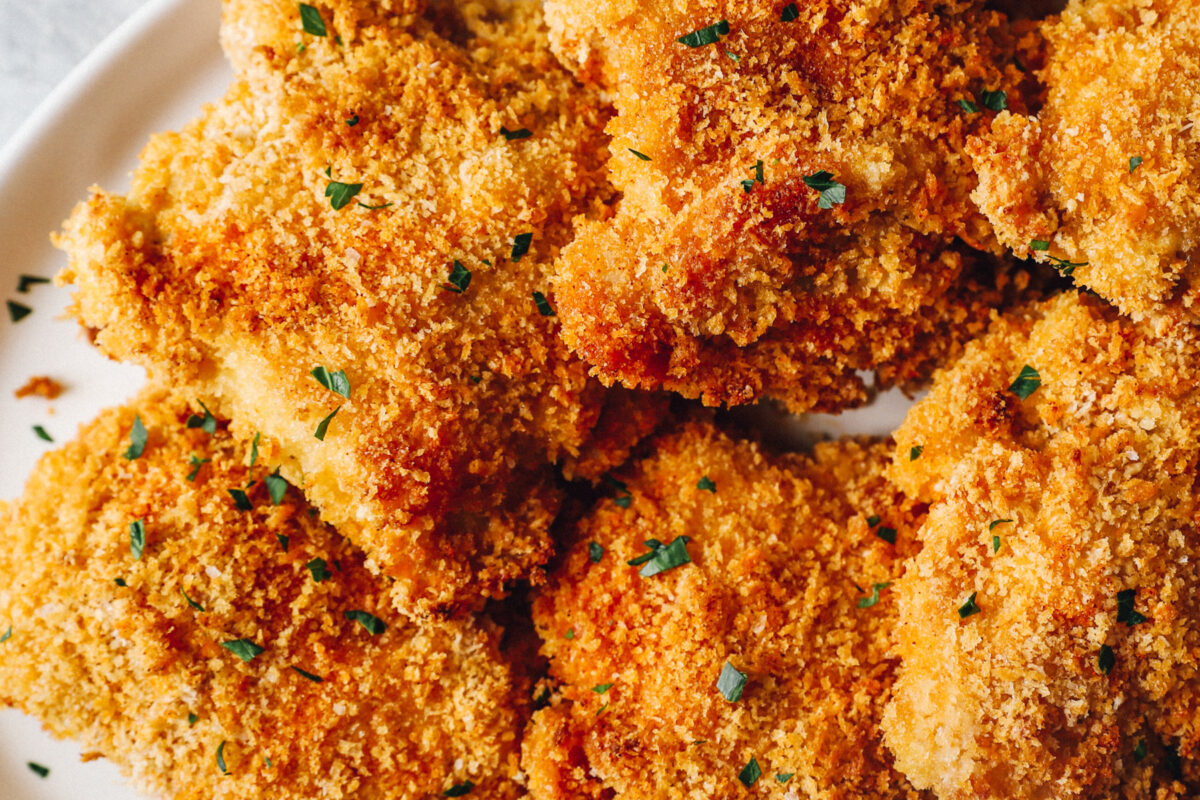
Rest and serve: Let the chicken rest for a few minutes before serving so the coating sets and stays crisp. Serve warm and enjoy!

How to Store and Reheat
These breaded chicken thighs will be at their crispiest if served straight out of the oven. But if you have leftovers, store them in an airtight container in the refrigerator for up to 3 days. Reheat in the oven at 350°F until warmed through.
Let thighs cool to room temperature, then store them in resealable, freezer-safe bags. Freeze up to 3 months, and defrost in the fridge before reheating in the oven. They will not be as crispy as if you served them fresh, but they will still be flavorful.
Serving Suggestions
When I serve these breaded chicken thighs, I like to keep the sides simple but flavorful so everything feels balanced. I’ll often make a batch of air fryer sweet potato fries for something crispy and slightly sweet alongside the savory chicken. If I want something more classic and comforting, I go with mashed potatoes, which soak up any extra flavor really well. For a brighter, herby option, Greek potatoes are one of my favorites to pair with this. And when I want to add something green, I’ll serve it with roasted parmesan broccoli for an easy, crispy vegetable that rounds out the meal.
More Easy Chicken Thigh Recipes
- Air Fryer Chicken Thighs: These air fryer chicken thighs are incredibly juicy with perfectly crispy skin, made with simple seasonings and cooked in under 20 minutes. It’s one of the easiest ways to get that roasted, crispy texture with minimal effort and cleanup.
- Grilled Yogurt Marinated Chicken Thighs: These yogurt-marinated chicken thighs are tender, flavorful, and slightly tangy, thanks to a simple marinade that locks in moisture before grilling. They cook quickly over high heat and stay incredibly juicy with a lightly charred finish.
- Honey Garlic Baked Chicken: This honey garlic baked chicken is coated in a sweet, sticky, and slightly savory sauce that transforms simple chicken thighs into a flavorful weeknight dinner. It’s an easy, toss-and-bake recipe that comes out juicy and packed with bold flavor every time.


This was quite good. I love the idea of pre-toasting the Panko. This made it nice and crispy. I also liked the coating, but next time I would add more salt and some other spices as it was a little bit bland.
I never leave comments or reviews on recipes but I made this chicken in my air fryer and it was DIVINE!!!! Preheat to 400, spray chicken with a bit of olive oil, cook for 12 mins, flip, more olive oil, cook for another 8 (cooked 2 thighs). Perfection. Thank you!
This is a great recipe. It felt like we were eating Southern fried chicken. For ease, putting the flour mixture in a plastic bag and shaking each piece to coat worked well. I added about a tablespoon on plain Greek yogurt (thank you, Melissa) to the egg mixture to thicken it, then sprinkled the panko on top and bottom. They were larger thighs and baked 45 minutes to crispy perfection. I’ll definitely repeat this.
It worked great. Tasted great. Will do it again
I’ve made this recipe a good few times and I have a couple questions
1. I make sure I pat dry the chicken and make sure to cover the chicken with flour but the minuet it goes into the egg the flour goes away and it’s so watery. Is that normal? I mix the egg and milk combo very well (is it because I use milk? I don’t like to cook using water especially since I rarely use it in baking.)
-what’s the purpose of flour if it disappears the minuet it hits the egg mixture
2. With the mayo version, how do you make it not look like toothpaste? I do a mayo version when I cook chicken tenders and it honestly turns into a paste very fast and makes it look horrible. Should I try the Greek yogurt version?
Other then that I absolutely love using the recipe! I always use boneless chicken but since my oven sucks it tends to take an extra 5 minutes to get it crispy and to 165. Also could my bread crumbs be a problem? I shop at alids so it’s 50/50 if they have panko available. Thank you to everyone who helps out! I’m young and I wanna learn to cook more!
Hi Sara, Thanks for the great review!
1. The flour layer isn’t meant to stay dry once it hits the egg mixture. Its job is to act as a base so the egg has something to grab onto. If the flour seems to “disappear” the egg mixture might be too thin. Try using less milk for a thicker coating and make sure to use a light, even layer of flour—too much can prevent it from sticking well.
2. For the mayo version, use a thin, even layer of mayo—just enough to lightly coat the chicken. Too much is what creates that paste look.
This is my new favorite recipe! So easy to make and so delicious! Fed our family of four and everyone was happy:)
This recipe is delicious . Very juicy. Only thing I did different is add some smoked paprika as I prefer that. I served the chicken over waffles with a little maple syrup . Thank you ! I will definitely check out more of your recipes.
I’m afraid I’m one of -those- people who “changed” a recipe. So. I was a completely ill-prepared cook tonight, and this recipe turned out really well in spite of myself! Everyone loved it and (thankfully) had seconds.
1. I defrosted “some” pre-packaged chicken thighs and ended up with NINE pieces. Sigh.
2. I realized I didn’t have panko, so I had to sub garlic and herb breadcrumbs.
3. The poor prep continued. I only had smoked paprika, so yep. That got subbed in too.
Outside of my crazy work, I love the fact that this recipe was idiot-proof. The thighs were juicy, the breading was crisp and I looked like I knew what I was doing from the get-go!
Hi Becky, this is a great recipe! I usually grill thighs but not in the pouring rain. My panko breadcrumbs didn’t really brown very well… but they were still crispy. Since I haven’t seen anyone else comment on that, I feel like I’m doing something wrong. I did follow your recipe exactly. I’m even thinking of browning them briefly in a skillet before putting in oven but that kind of defeats the purpose, no?
Hi Richard, Make sure you aren’t overcrowding the chicken.
Do I need to flip the chicken halfway?
Hi Melissa, we did not flip ours, but you can if you’d like.