Updated
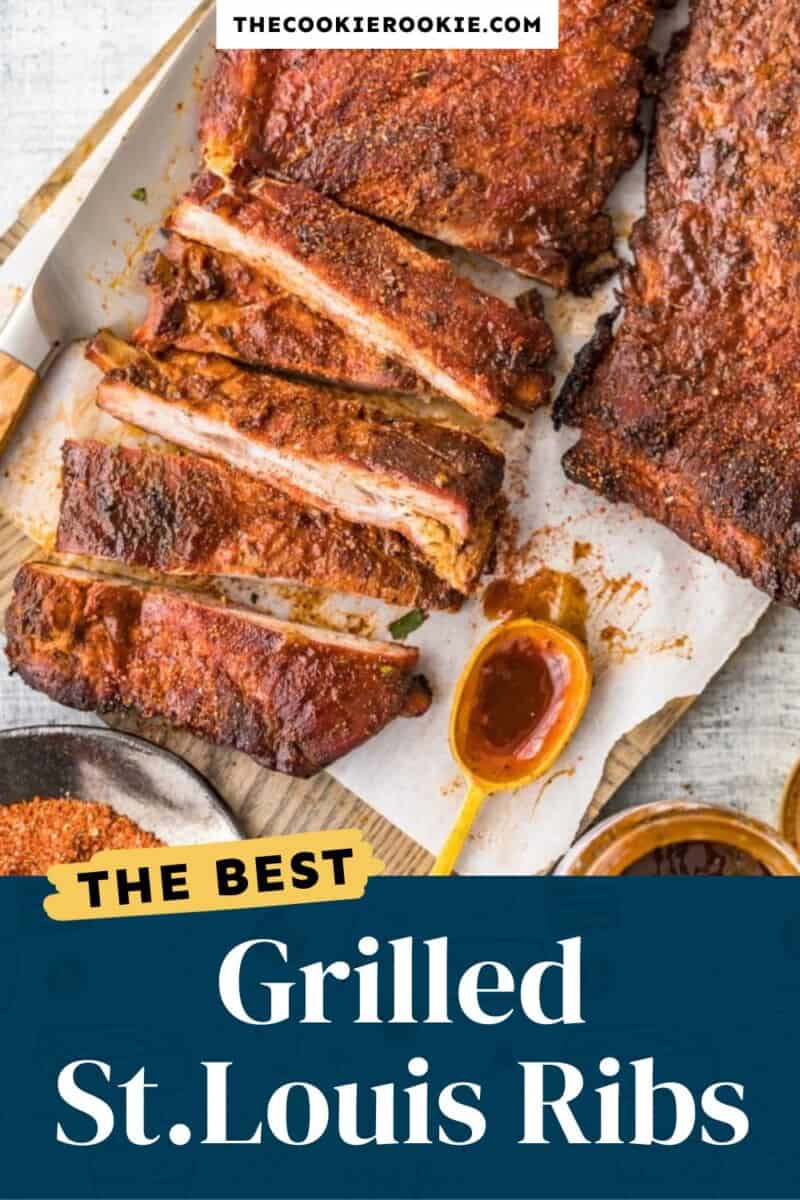
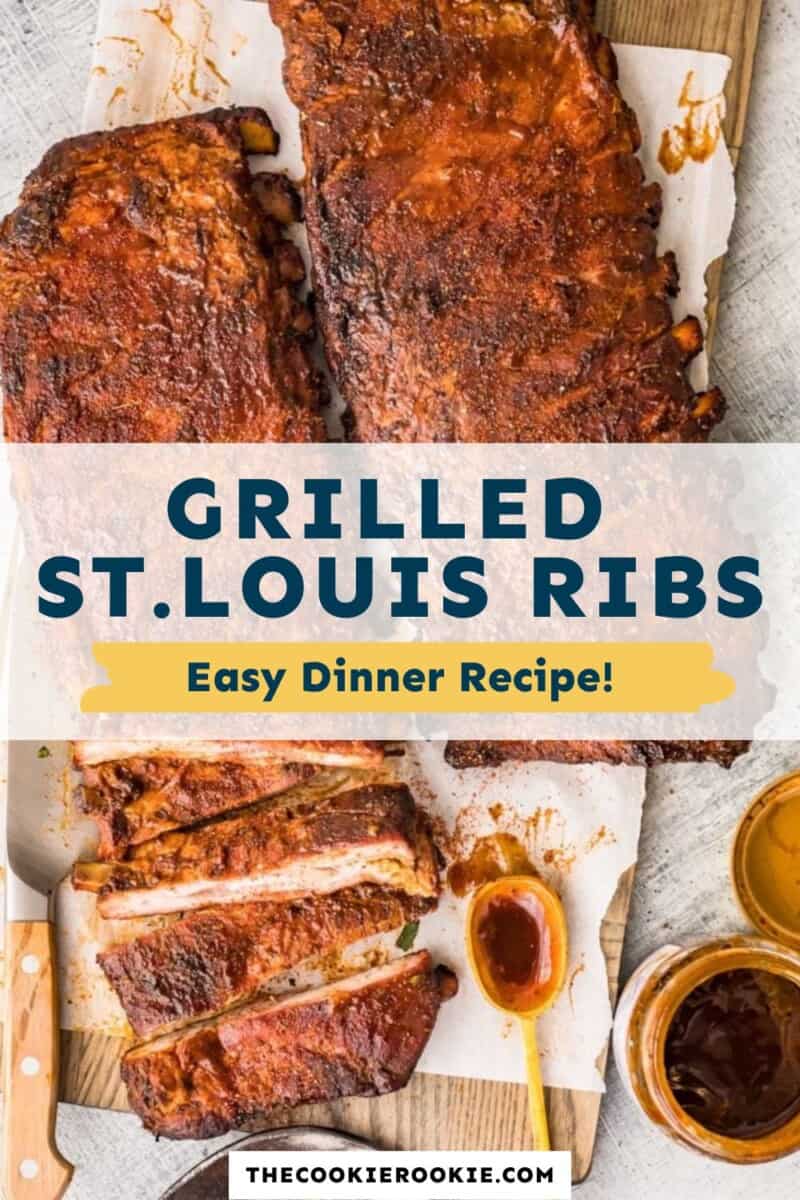
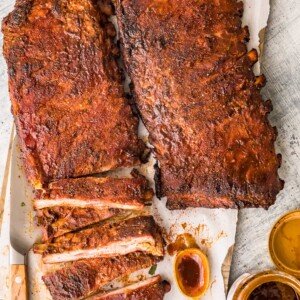
If you’re firing up the grill, these St. Louis grilled ribs deserve a spot on the menu. They’re rubbed with a sweet and smoky blend of spices, grilled low and slow until fall-off-the-bone tender, then brushed with barbecue sauce that gets deliciously sticky and caramelized over the heat. While they take about 3½ hours from start to finish, the grill handles most of the work, making them perfect for lazy summer afternoons, backyard BBQs, and feeding a hungry crowd.
5-Star Review
“Great, great, great. I have a small Weber, so I can only do one rack at a time, but anyone who has tried these ribs loves them. I’m using mesquite because I always forget apple wood when I’m shopping, but it still turns out great. To mitigate, I use apple cider vinegar in my mopping and sometimes in my water pans.” – Chris
Easy St. Louis Style Ribs
I love making these ribs for summer cookouts because they always feel a little special without being difficult. Over the years, I’ve found that St. Louis ribs are one of the easiest cuts to cook consistently on the grill. They’re meatier and more evenly shaped than baby back ribs, which helps them cook at the same rate from end to end. One of the most important steps is removing the membrane from the back of the ribs before seasoning. It only takes a minute, but it makes a huge difference in how tender the finished ribs turn out.
The secret to juicy, fall-apart tender ribs is cooking them over indirect heat and giving them plenty of time. This slow cooking method allows the fat and connective tissue to break down without drying out the meat. I always look for a few signs that they’re done: the meat should have pulled back from the ends of the bones, the rack should bend easily when lifted from the center, and the internal temperature should be around 195-205°F. I wait until the final 20-30 minutes to brush on the barbecue sauce so it gets sticky and caramelized without burning. Every time I make them this way, they disappear fast.
St. Louis Ribs (Grilled)
Ingredients
For the Ribs
- 2 slabs St. Louis-Style Ribs 7-9 ribs each
- 2 tsp kosher salt
- canola oil
- 2 tbsp dry rub for pork
- ¼ cup barbecue sauce Homemade or Blue’s Hog Original are our favorites
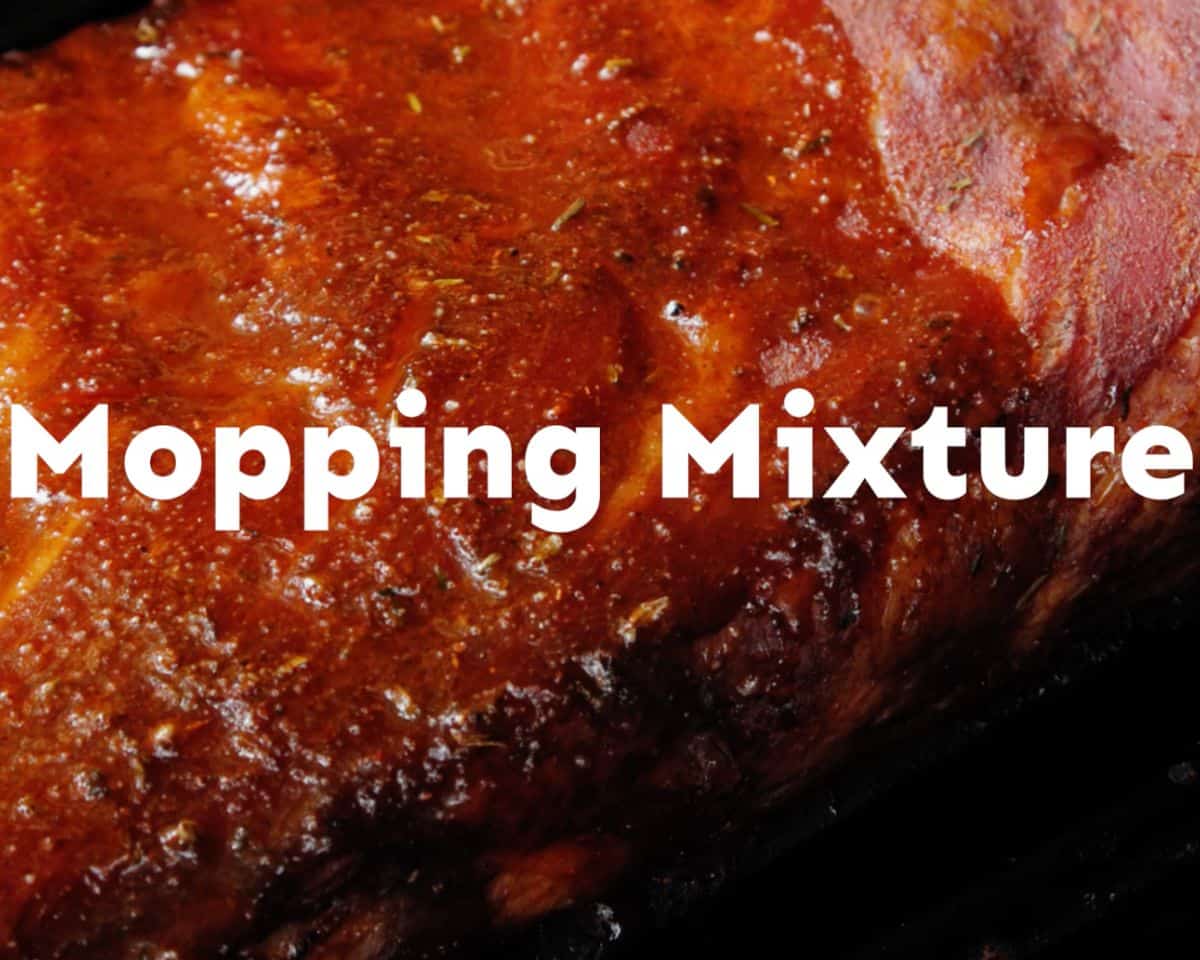
For the Vinegar Mopping Mixture
- ½ cup distilled white vinegar
- ½ cup water
- ½ cup dry rub for pork
Video
Instructions
For the Vinegar Mopping Mixture
- Mix all ingredients together in a small bowl. Set aside for now.½ cup distilled white vinegar, ½ cup water, ½ cup dry rub for pork
For Prepping the Ribs
- Rinse the ribs under cool water to remove any bone chips from butchering.2 slabs St. Louis-Style Ribs
- Remove the membrane from the ribs if it is still intact. HERE is a great instructional video.
- To dry brine the ribs, season them with kosher salt like you would if they were served to you unsalted; about ¼ tsp per pound of ribs. Wrap each slab with plastic wrap and refrigerate 1-2 hours.2 tsp kosher salt
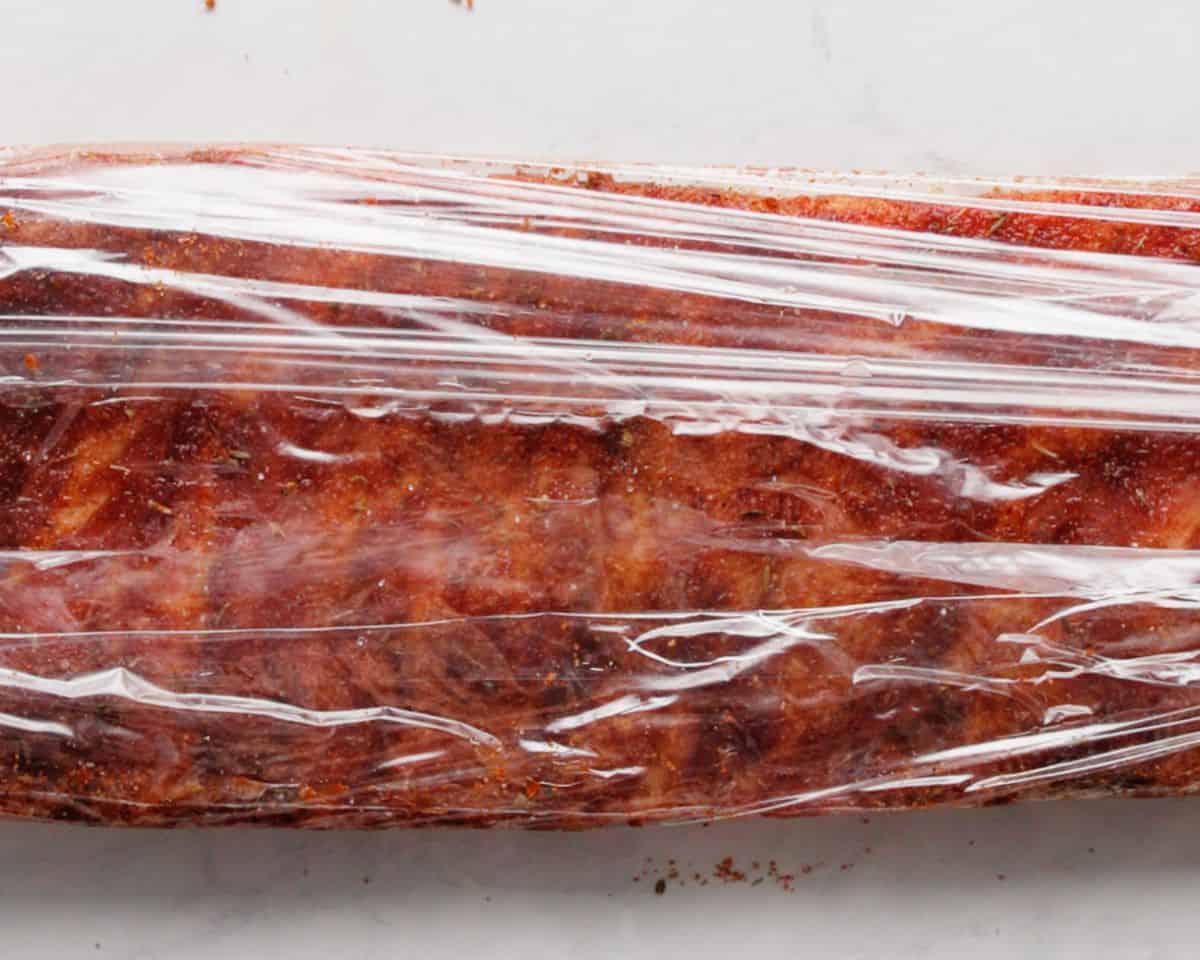
- After 1-2 hours, remove the ribs and liberally brush both with canola oil. Sprinkle 2 tbsp of the pork dry rub evenly over both sides of each slab of ribs, and wrap the ribs with plastic wrap.canola oil, 2 tbsp dry rub for pork
- Place the ribs in the fridge for 8-24 hours.
For Cooking the Ribs
- When it’s time to grill the ribs, a two-heat-zone grilling method will be used, and 225°F is the optimal temperature.
- To set up a kettle-style grill for slow, low cooking, start by heating half a chimney of briquettes.
- Remove the ribs from the fridge to warm to room temperature.
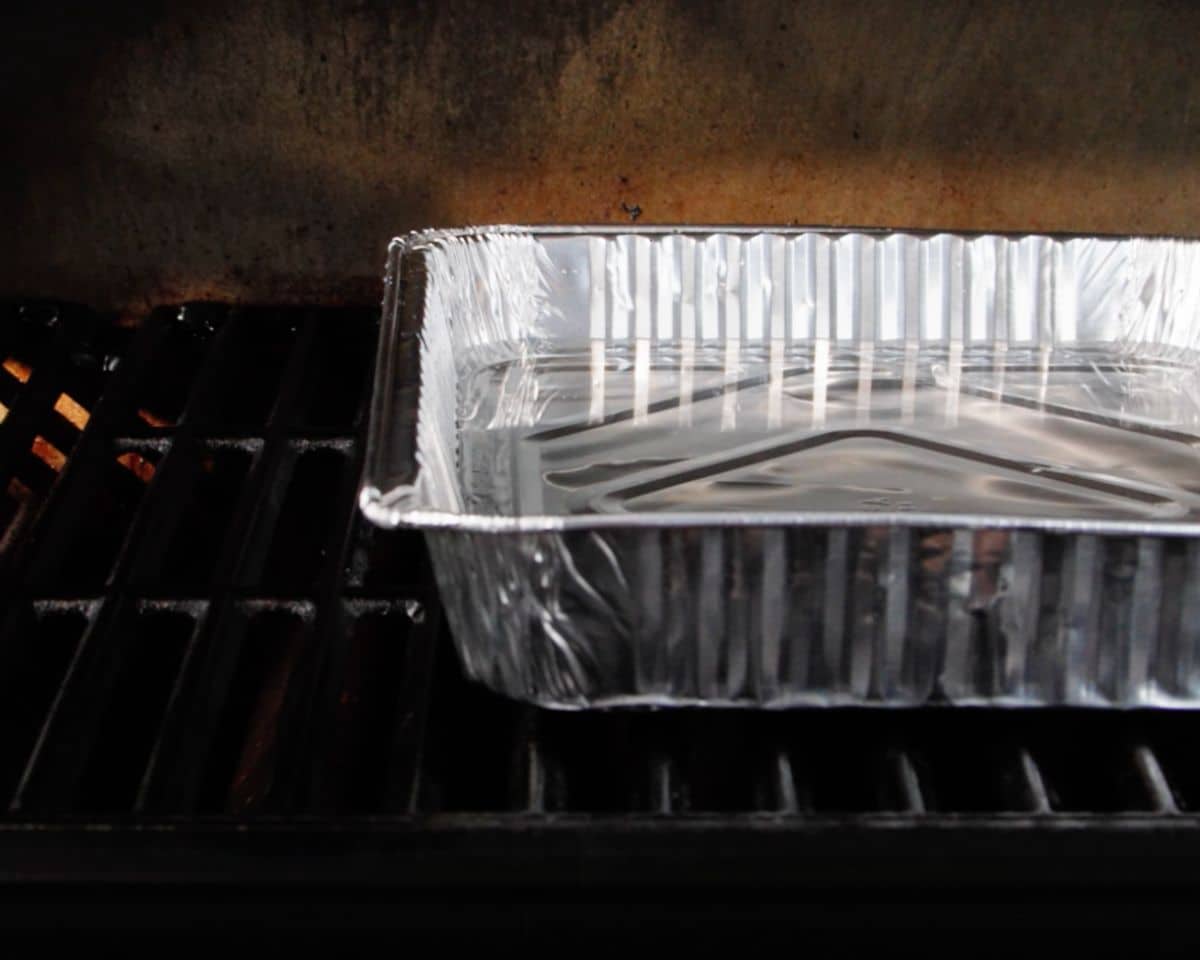
- Once the briquettes are ready, pour them over the lower grate and against one side of the grill. “Bank” them up the side of the grill. Place 4 oz. of wood chips/chunks on top of the coals. Fill a stainless steel pan with 2 cups of water and set it on the cool side of the grate opposite the coals, and close the grill lid.
- Adjust the intake damper on the bottom of the grill to get the temperature of the grill to 225°F before adding the ribs. Place the upper grate over the grills with the lift-up opening placed over the coals. Preheat the grill 5 minutes, then open it and clean and oil the upper grate.
- Place a stainless steel pan filled with 2 cups of water, on the grate, directly over the coals.
- Unwrap the ribs and place them, meaty side up, on the cool side of the grate opposite the pan of water. “Mop” the ribs with the Vinegar Mopping Mixture.
- Place the lid on, with the vent over the ribs, and cook 30 minutes.
- After 30 minutes, place another 4 ounces of wood chips/chunks directly onto the coals. Replace the lid and cook an additional 2½ hours.
- If the temperature goes below 200°F, add 10 hot briquettes over the coals (as needed). Also, add additional water to the water pans, as needed.
- After the ribs have cooked a total of 3 hours, “mop” the slabs with the Vinegar Mopping Mixture and turn them 180°. Do NOT flip them over. Close the lid and cook an additional 2 hours. Keep a close eye on the grill's internal temperature and add more hot coals and water, if needed.
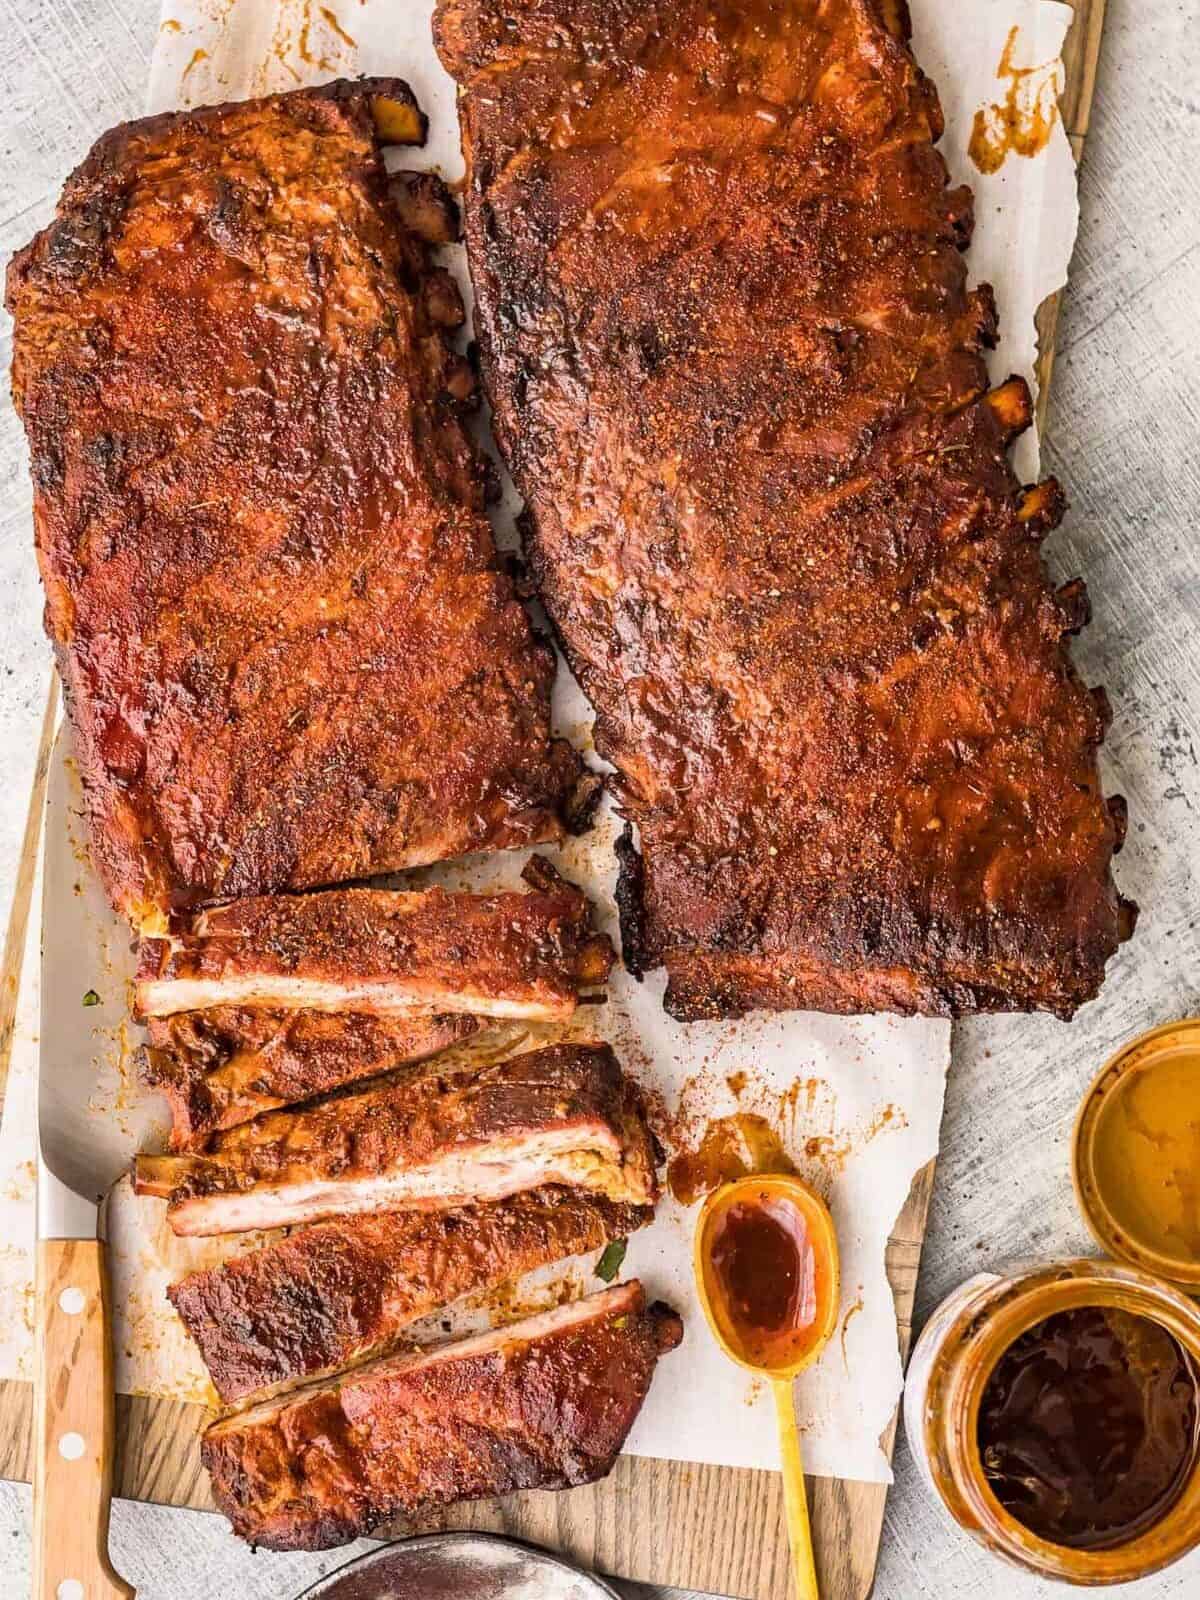
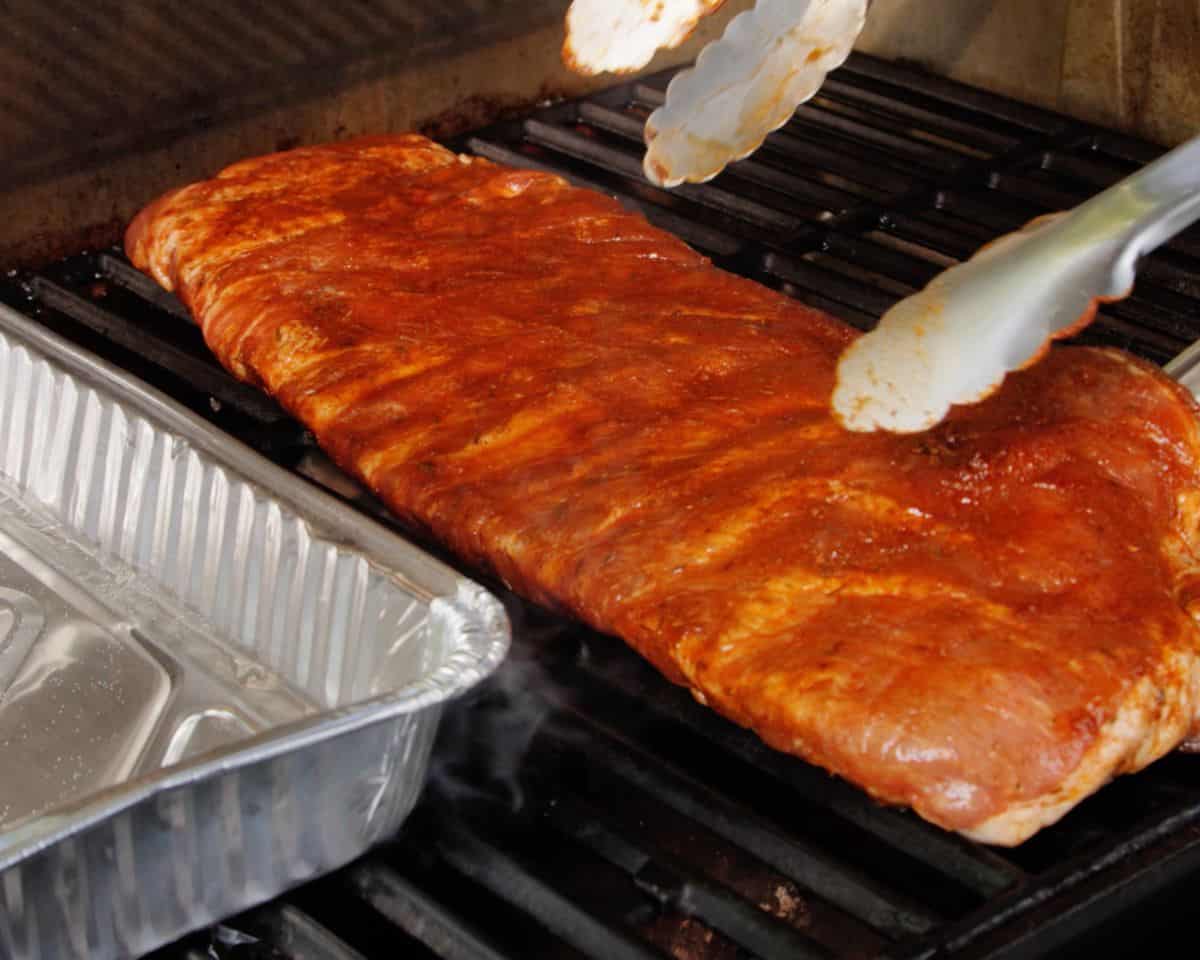
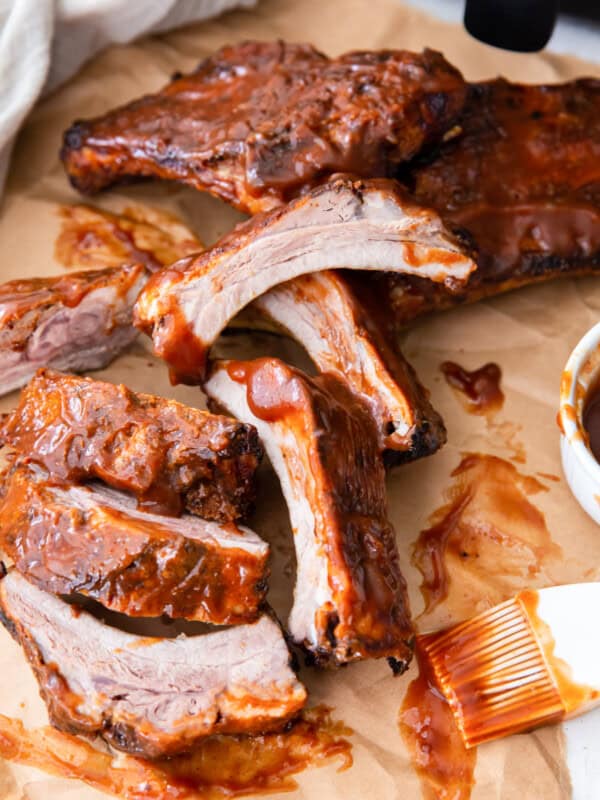
- After a total of 5 hours cooking time, heat another ½ chimney of briquettes. While the briquettes heat, take a peek at the ribs, and give the ribs the “bend test.” (Pick the meat up, with tongs, by one end to see if the meat will “break” or slightly tear apart, if it does, it’s ready). Transfer the ribs to a baking sheet to coat lightly with your favorite BBQ sauce and to rest while the coals heat.¼ cup barbecue sauce
- Once the coals are hot, place a slab of ribs directly over the coals and cook 30 seconds each side. Repeat with the second slab of ribs.
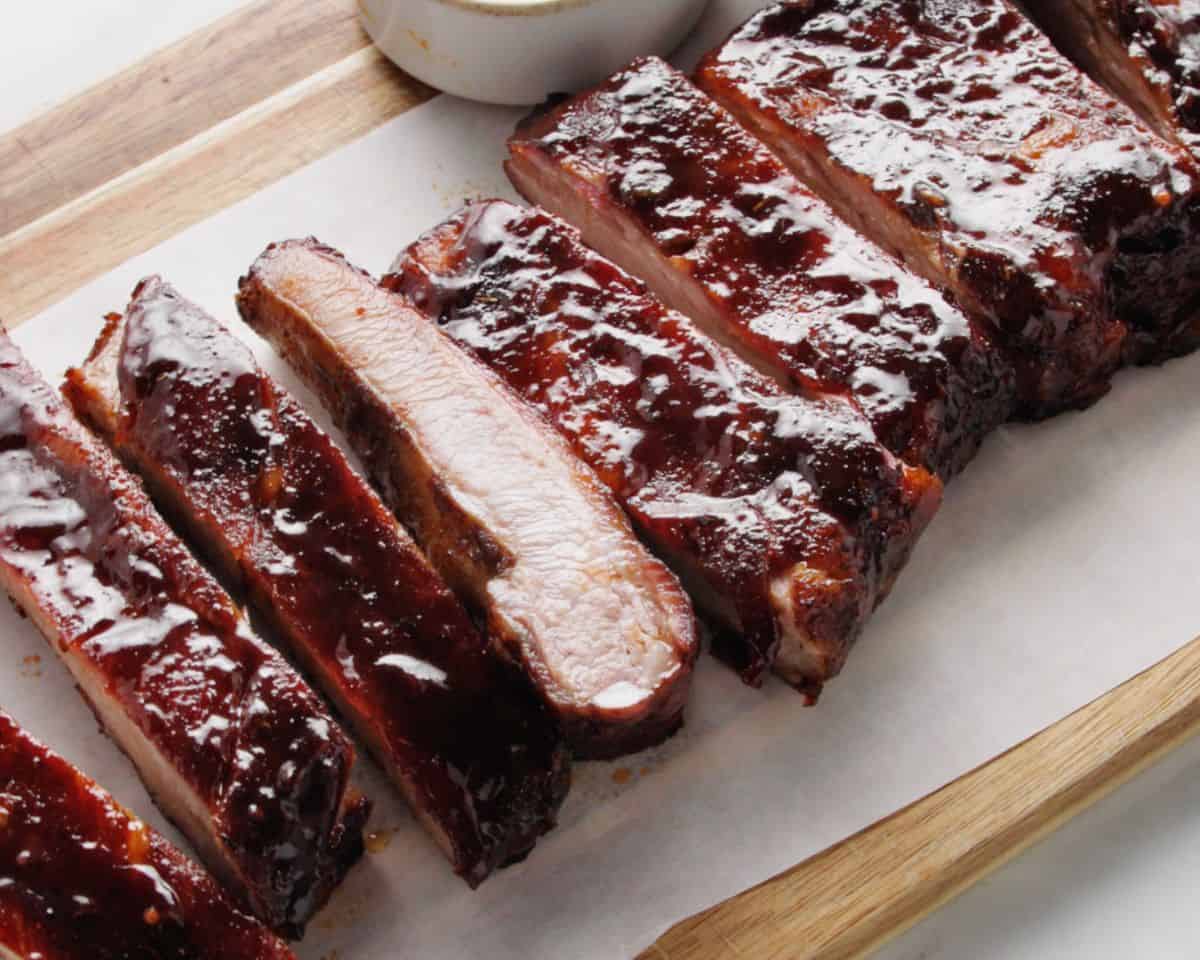
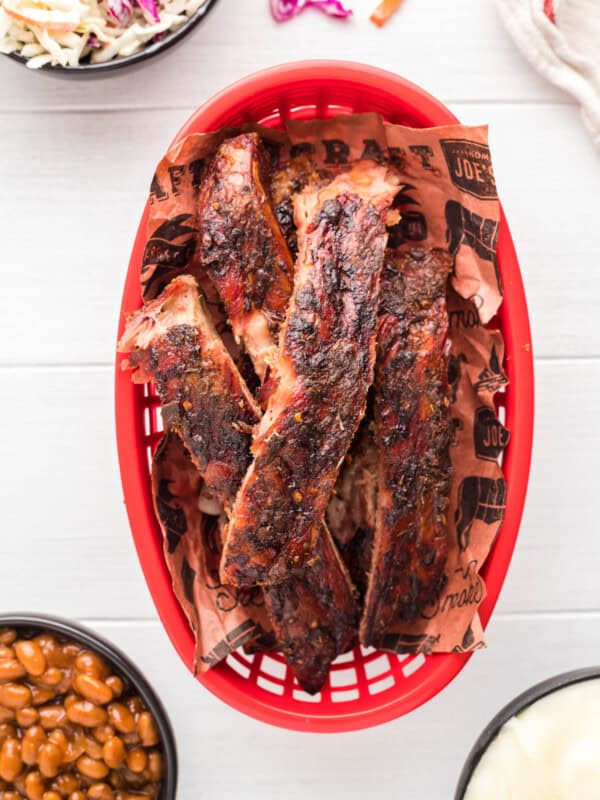
- Cut the ribs between the bones and serve.
Equipment
- Grill or Indoor Grill Pan
- 8 oz. Apple or hickory wood chips or chunks
- Baking Sheet
Becky’s Tips
- Ask your butcher to remove the membrane on the ribs to save you some prep time.
- Remove the membrane from the back of the ribs for the most tender texture.
- Dry brine the ribs with kosher salt for 1-2 hours before applying the dry rub.
- Refrigerate the seasoned ribs for 8-24 hours for deeper flavor.
- Maintain a grill temperature as close to 225°F as possible throughout cooking.
- Use a two-zone fire setup and cook the ribs over indirect heat.
- Keep water pans filled during cooking to help regulate temperature and moisture.
- Add additional hot briquettes if the grill temperature drops below 200°F.
- Rotate the ribs halfway through cooking for more even results.
- Use the bend test to check for doneness. The rack should bend easily and crack slightly on the surface when lifted with tongs.
- Internal temperature should reach 195-205°F for maximum tenderness.
- Brush on barbecue sauce near the end of cooking to prevent burning.
- Finish the ribs briefly over direct heat to caramelize the sauce.
- Let the ribs rest for 10 minutes before slicing.
- Slice between the bones with a sharp knife for clean portions.
Nutrition information is automatically calculated, so should only be used as an approximation.
How to Make St. Louis Ribs Step by Step
Gather the ingredients: Gather all the ingredients together. In a small bowl, whisk together ½ cup distilled white vinegar, ½ cup water, and ½ cup pork dry rub until well combined. Set aside.
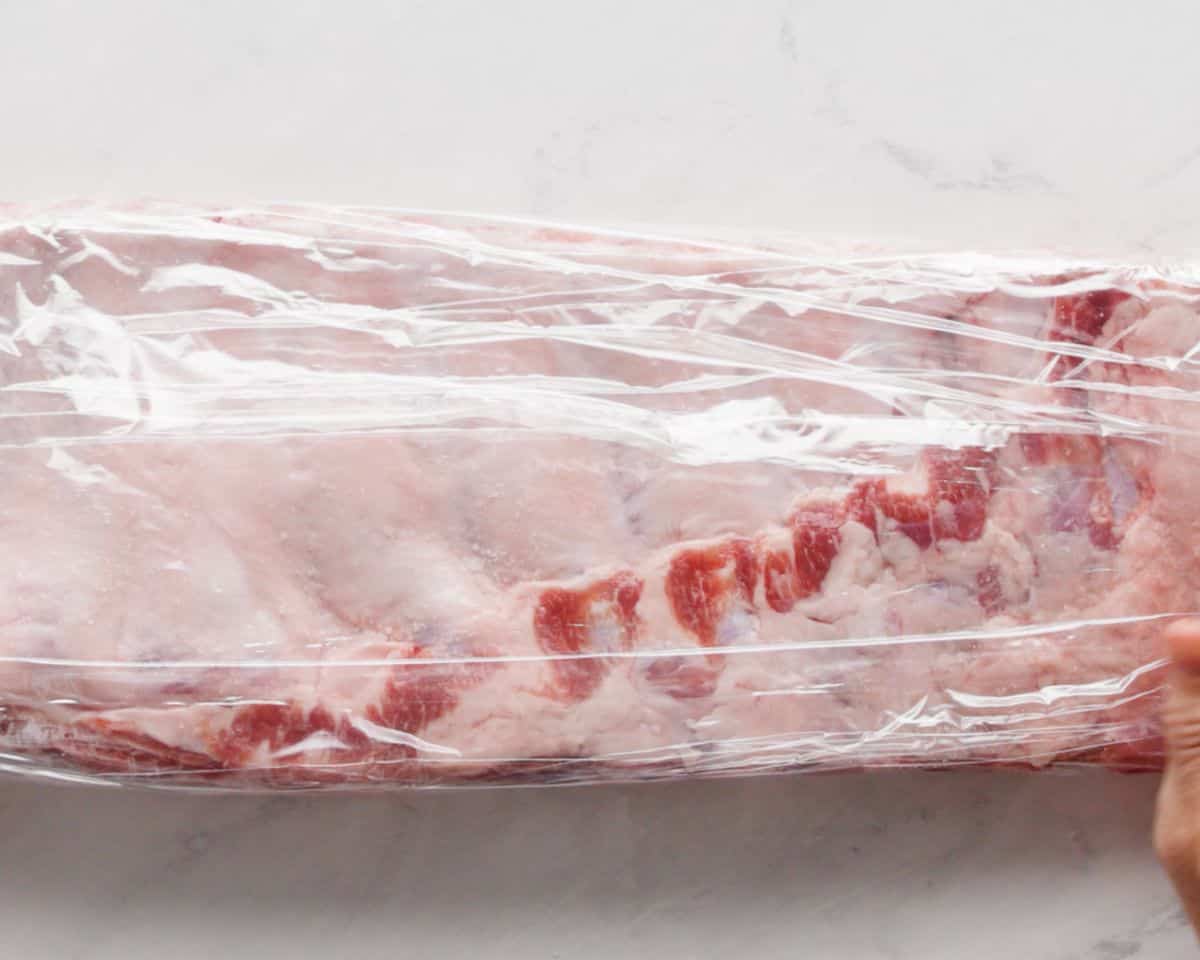
Prep and Dry Brine the Ribs: Rinse the 2 slabs of St. Louis-style ribs under cool water to remove any bone fragments from processing. Pat them completely dry with paper towels.
Remove the membrane from the back of each rack if it’s still attached. This helps the seasoning penetrate the meat and creates more tender ribs.
Season and Rest the Ribs: Season both racks evenly with 2 tsp kosher salt, using about ¼ tsp per lb of meat. Wrap each slab tightly in plastic wrap and refrigerate for 1-2 hours.
Unwrap the ribs and brush both sides lightly with canola oil. Sprinkle 2 tbsp pork dry rub evenly over each slab, coating both sides. Wrap the ribs again and refrigerate for 8-24 hours to allow the flavors to develop.
Prep the grill: About 30 minutes before cooking, remove the ribs from the refrigerator and let them sit at room temperature while you prepare the grill.
Fill a chimney starter halfway with briquettes and light them. Once the coals are covered with gray-white ash, pour them onto one side of a kettle grill, banking them against the wall of the grill to create a two-zone cooking setup.
Place 4 oz of wood chips or wood chunks directly on the hot coals. Fill a stainless steel pan with 2 cups water and place it on the cool side of the grill opposite the coals. Close the lid and adjust the bottom intake damper until the grill stabilizes at 225°F.
Position the cooking grate so the lift-up section sits over the coals. Cover the grill and preheat for 5 minutes, then clean and oil the grates.
Place a second stainless steel pan filled with 2 cups water directly over the coals on the cooking grate.
Start Smoking the Ribs: Unwrap the ribs and place both racks meat-side up on the cool side of the grill, opposite the water pan. Generously brush the ribs with the prepared vinegar mop.
Close the lid with the top vent positioned over the ribs and cook for 30 minutes.
After 30 minutes, add another 4 ounces wood chips or chunks to the coals. Close the lid and continue cooking for 2½ hours, maintaining a grill temperature as close to 225°F as possible.
Note: If the grill temperature drops below 200°F, add about 10 hot briquettes to the fire. Refill either water pan as needed throughout cooking.
Vinegar Mop and Rotate: After the ribs have cooked for 3 hours total, brush both racks again with the vinegar mop and rotate them 180°F for more even cooking. Do not flip them over. Close the lid and continue cooking for 2 more hours, monitoring the temperature and replenishing coals and water as needed.
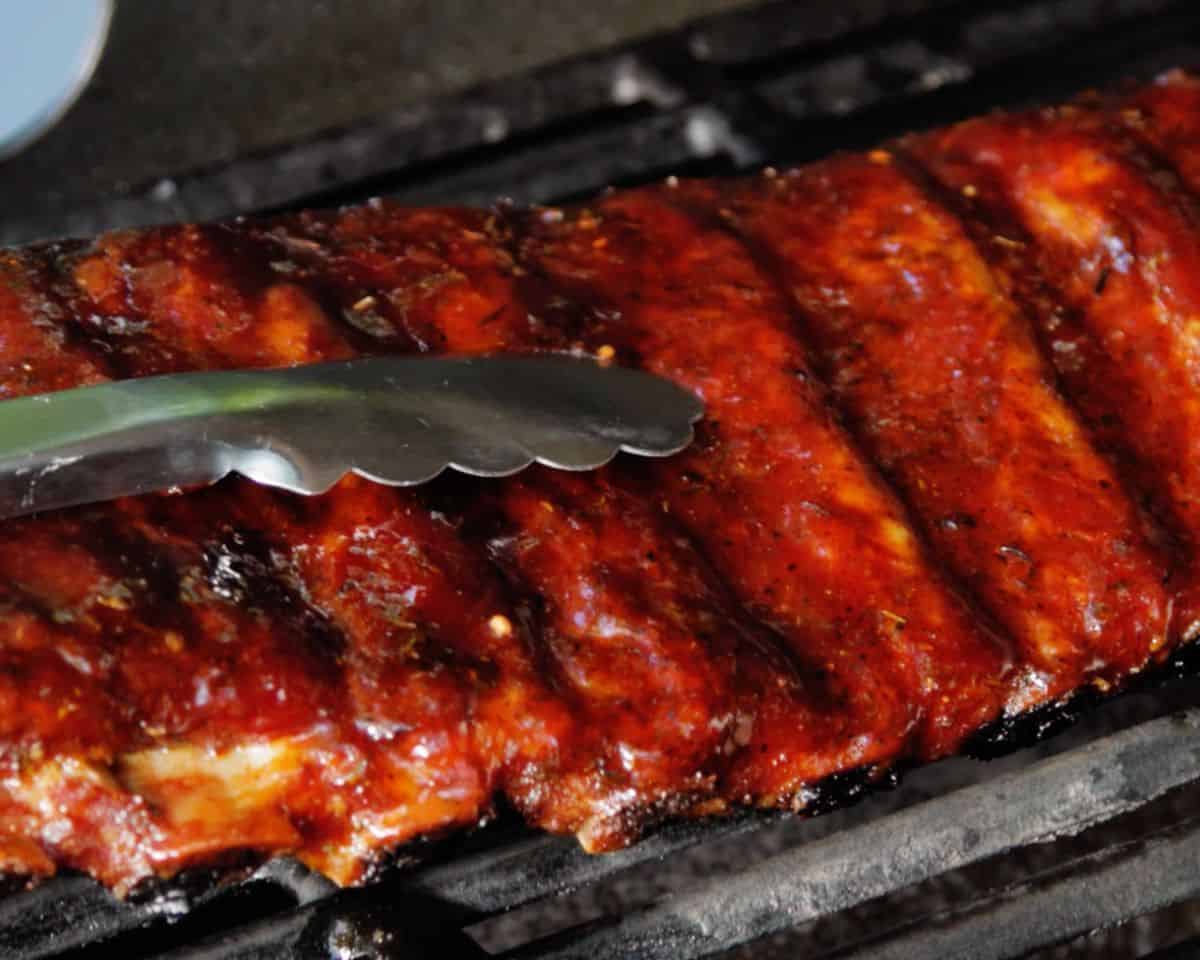
Check and Sauce the Ribs: After about 5 hours of total cooking time, light another half chimney of briquettes. While the coals heat, check the ribs for doneness using the bend test. When lifted from one end with tongs, the rack should bend easily, and the surface should begin to crack slightly.
Transfer the ribs to a baking sheet and brush both racks lightly with ¼ cup barbecue sauce. Let them rest while the fresh coals finish heating.
Once the new coals are hot, place each rack directly over the fire and cook for about 30 seconds per side. The sauce should caramelize and develop a slightly sticky glaze without burning.
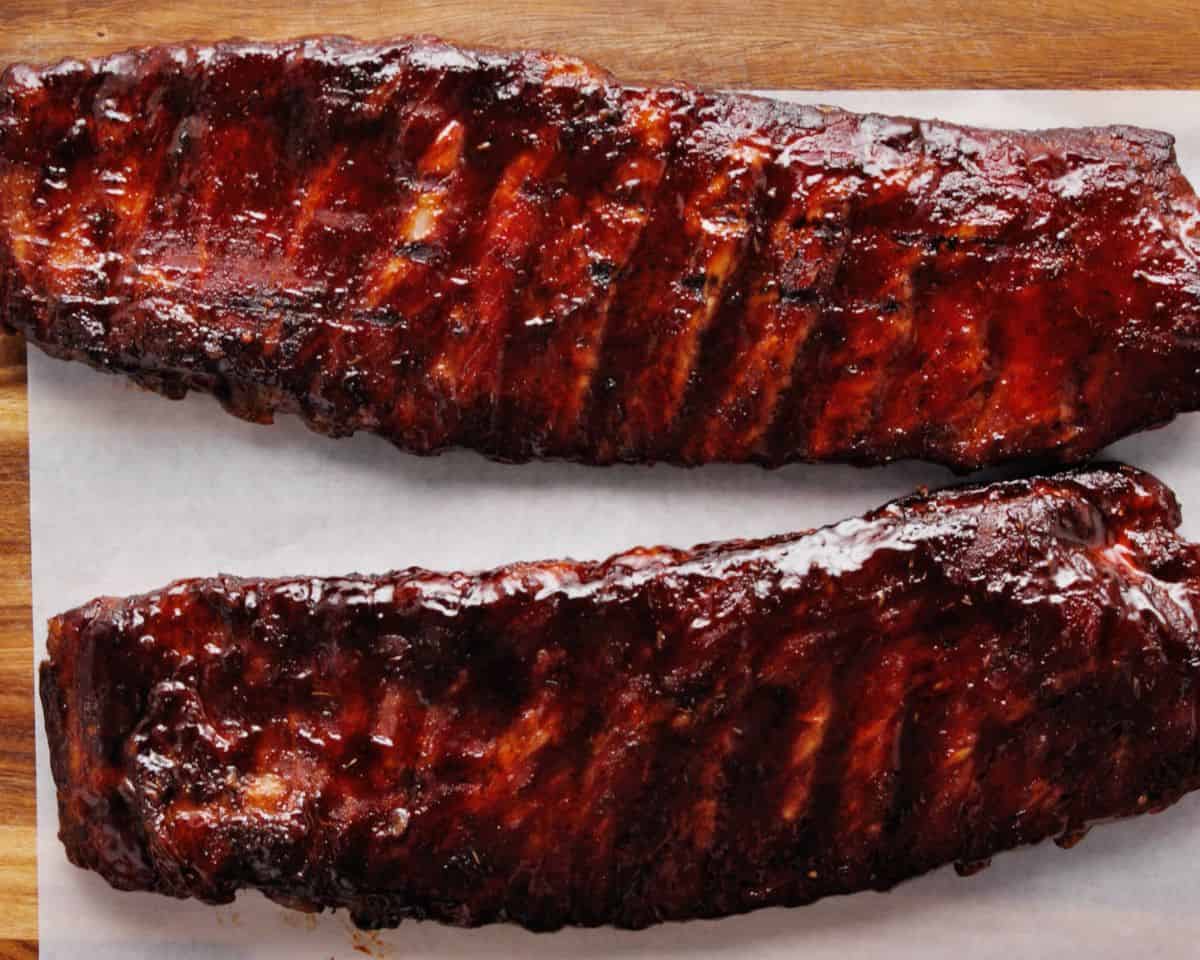
Finish the Ribs: Transfer the ribs to a cutting board and let them rest for 10 minutes. Slice between the bones and serve warm.
How to Tell When Ribs Are Done
One of the biggest mistakes people make when grilling ribs is relying on cook time alone. Every grill cooks a little differently, so I like to use a combination of visual cues and simple tests to know when the ribs are perfectly tender.
- Try the bend test. Using tongs, lift the rack from the center. The ribs should bend easily, and the surface should begin to crack slightly. If the rack feels stiff, it needs more time.
- Use the toothpick test. Insert a toothpick or skewer between the bones. It should slide in and out with very little resistance, similar to inserting it into soft butter.
- Look for the meat to pull back from the bones. As the ribs cook, the meat will shrink slightly and expose about ¼-½ inch of bone at the ends. This is one of the easiest visual signs that they’re getting close.
- Check the temperature. For the most tender ribs, aim for an internal temperature of 195-205°F. Keep in mind that temperature is only part of the story. The ribs should also pass the bend and toothpick tests before they’re ready to serve.
When all four signs line up, you’ll have juicy, tender ribs that are easy to bite through and packed with flavor.
How to Store and Reheat
Place leftover ribs in an airtight container and refrigerate them for up to 4 days. For the best flavor and texture, let the ribs cool completely before storing.
Reheat
Wrap the ribs in foil and warm them in a 300°F oven for 15-20 minutes, or until heated through. Brush on a little extra barbecue sauce before reheating if you’d like to refresh the flavor and keep the meat moist.
Freezer
Wrap the ribs tightly in plastic wrap and foil, then place them in a freezer-safe bag or container. Freeze for up to 3 months. Transfer the ribs to the refrigerator and thaw them overnight before reheating.
Make Ahead
Remove the membrane and coat the ribs with the dry rub up to 24 hours before grilling. Cover and refrigerate them until you’re ready to cook. This extra time allows the seasoning to penetrate the meat and develop even more flavor.
Serving Suggestions
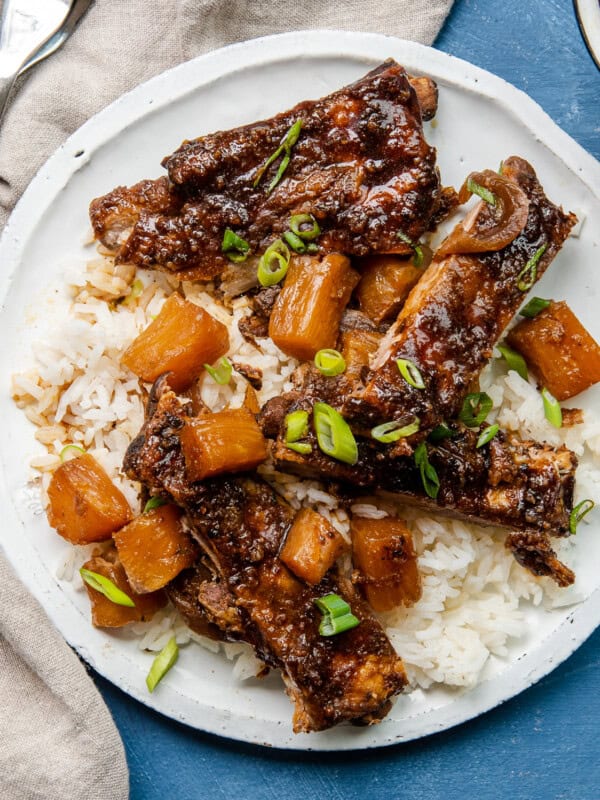
Whenever I make these St. Louis grilled ribs, I like to lean into the full backyard BBQ experience. The smoky, sticky ribs are rich and flavorful, so I always serve them with a few classic sides that balance everything out. One of my favorites is grilled corn on the cob, which adds a little sweetness and charred flavor that pairs perfectly with the savory ribs. If I’m feeding a crowd, I’ll usually add a big pan of baked beans too. The smoky-sweet flavors complement the barbecue sauce beautifully and make the meal feel extra hearty.
For family cookouts and holiday weekends, I love serving ribs alongside a creamy potato salad. The cool, tangy dressing is a great contrast to the warm, smoky meat and helps round out the plate. I’ll often add a bowl of crisp coleslaw as well. The crunchy texture and fresh flavor help cut through the richness of the ribs, making each bite feel balanced instead of heavy.
If I’m hosting a larger gathering or tailgate, I usually include a comfort-food favorite like mac and cheese. The creamy, cheesy pasta is always one of the first dishes to disappear, and it pairs especially well with barbecue flavors. A basket of warm cornbread is another must-have when I’m serving ribs to a crowd. It’s perfect for soaking up extra sauce and adds just the right touch of sweetness to the meal. The best part about serving ribs is that they naturally bring people together. Whether you’re hosting a summer cookout, celebrating a holiday weekend, or setting up a tailgate spread before the big game, these ribs fit right in alongside all of your favorite barbecue sides.
More Cookout Favorites We Love
- Juicy Grilled Burgers: Learn how to make juicy grilled burgers with perfectly seasoned beef and all your favorite toppings. This classic cookout recipe is easy to master and always a hit at family gatherings and summer parties.
- Grilled Ribeye: If you’re looking for another backyard grilling favorite, this grilled ribeye delivers a perfectly seared crust and a juicy, tender center every time. It’s a simple steak recipe that lets the rich flavor of the beef shine.
- Grilled Chicken Wings: These grilled chicken wings are crispy on the outside, juicy on the inside, and packed with smoky flavor. They’re perfect for game days, cookouts, and anytime you need an easy crowd-pleasing appetizer.
- Smoked Brisket: This smoked brisket is worth the wait. Low-and-slow cooking transforms a tough cut of beef into tender, flavorful slices with a rich smoky bark that’s perfect for BBQ lovers.


These ribs are so good. i used these in my smokersfalre. they are delicious.. thanks for sharing this
Thanks for sharing, Lauren!
Great, great, great. I have a small Weber so I can only do one rack at a time, but anyone who have tried these ribs love them. Im using mesquite, because I always forget apple wood when I’m shopping, but still turns out great. To mitigate I use apple cider vinegar in my mopping and sometimes my water pans.
Thanks for sharing your success with us, Chris!
These ribs are so good. The family loved them!
Awesome! Thanks, Katie!
OMG yummmm…. I love a great ribs recipe – this one is AMAZING
Thanks, April!!
Yum! This rub looks so orange rather than brown… is that what makes it St. Louis-ey??
St. Louis ribs are life! can’t wait to make these this summer!
SAME
I can’t wait to try this recipe! It looks fantastic!!